
Guide to Painting Maple Cabinets
The heartbeat of every home seems to always revolve around the kitchen. We watch food being made, gather to munch the food and appetizers at parties, to just sitting to catch up with a friend. The kitchen is the one room that also will typically determine if you buy a home. Aside from bathrooms, kitchens are the most costly remodel as well (outside of an addition). Knowing that, we turn to kitchen remodeling, and the process and a Guide to Painting Maple Cabinets.
Painting maple cabinets is the most affordable to give your kitchen a new look and feel. Next to repainting cabinets, you can reface- getting new door fronts, which is about 30% more compared to painting cabinets.
If you are ready for a change in the look and feel of your stained maple cabinets, then we are here to help. Ideally, we would love to help you repaint your cabinets, but we know we are to a fit for everyone. So, we at Dfranco Painting and Wallpape, are here to guide you through the process of painting your maple kitchen cabinets.
With 20 years of experience under our belts, we have seen some interesting cabinet painting situations. From DIY disasters to professional paint jobs that look like cabinet ninjas themselves did them. Let’s walk you through the step-by-step process of painting your maple cabinets, whether you’re a homeowner looking for options, learning how to do it yourself, or comparing cabinet painting contractors to find the right fit for your project.
Look at your Cabinets before you paint them

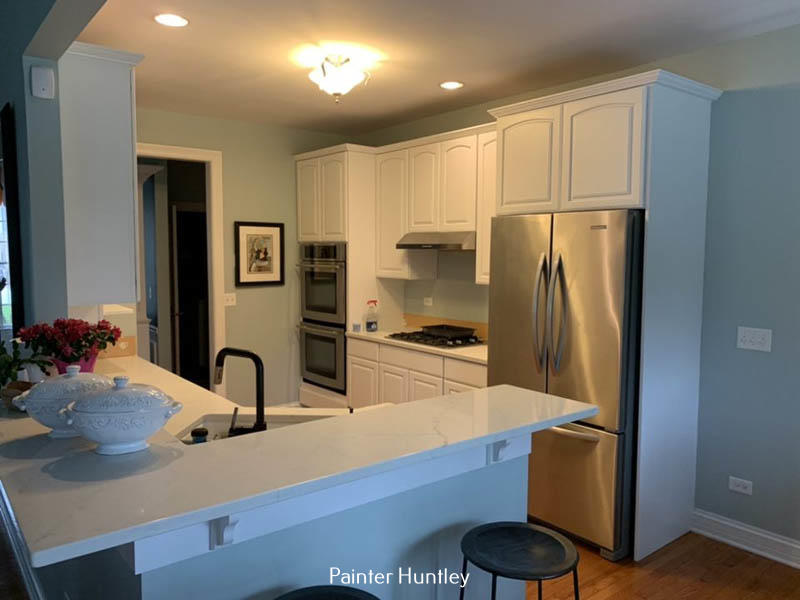
1st make sure you have maple cabinets! Here is a pic of Cherry and Oak cabinets. There is a difference between oak, cherry and maple. Some people think they have cherry cabinets when in fact they are maple cabinets stained to a cherry finish. One of our most recent customers in Algonquin thought they had cherry cabinets and found out they had maple-stained cabinets. Made a huge difference once we started to prime the doors for paint!
Are your cabinets damaged? We are looking for cracks, scratches nics/dings.
Do you need or want new hinges? Soft close are pretty cool!
Is it time for new hardware (handles) Heck maybe you don’t have handles and the time has come to install some.
These are the starting points of the cabinet painting process.
Materials you need to paint kitchen cabinets
If you’re going to tackle this yourself- Let’s make sure you have all the necessary supplies. Painting cabinets is a bit more work than painting your walls.
If painting cabinets yourself..Here’s what you’ll need:
- Cleaner, Degreaser or TSP substitute
- Sandpaper (220, 320 and 400-grit)
- Primer (bonding primer, stain blocking- oil-based or latex)
- High-quality paint (we recommend a urethane at minimin )
- Paint rollers, brushes, and trays
- Painter’s tape
- rags
- Drop cloths or tarps
- wood filler
- Screwdrivers,
- putty knife


When it comes to paint, don’t skimp! Invest in a premium brand like Sherwin-Williams or Benjamin Moore. The extra cost will be worth it!! If you are here in Huntley like us, it is great because both of these stores are right next to each other!
Preparing Cabinets for Painting
Step 1: Proper Preparation Prevents Poor Performance! That is what my son’s ScountMaster used to say. The key to a successful cabinet paint job is all in the preparation. This is where you’ll do the dirty and hardest work, but trust us – it’ll make the results worth it!
First, start by thoroughly cleaning your cabinets. Use a degreaser (dawn dish soap work great!) or TSP substitute to remove any built-up grease, grime, or residue. This will help the paint adhere better and prevent any unsightly bubbles or peeling down the line.
Next, remove all the cabinet doors, drawers, and hardware. This will give you better access to the surfaces and make the painting process much easier. Label each door and drawer so you know where they go when it’s time to reassemble.
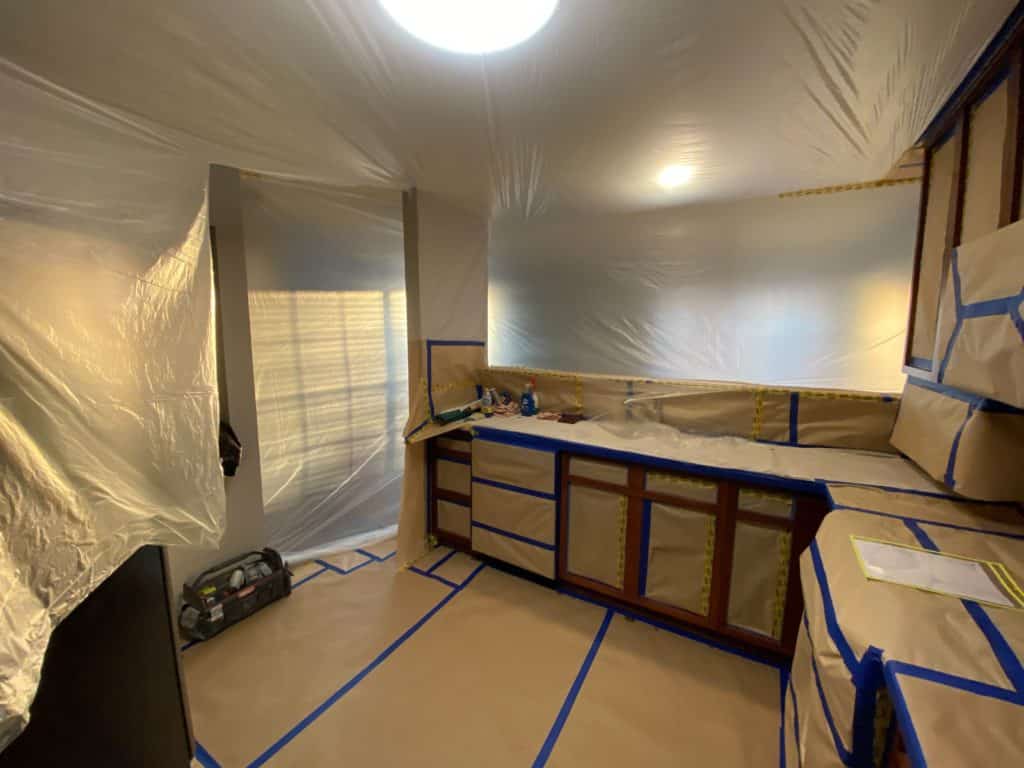
Mask and Cover! Before sanding and making a real mess- you need to mask everything not getting painted! If your using a brush and roller it is not as critical, but if you are spraying- you better have every single centimeter covered! This job in Lake in the Hills was interesting as they had no air or heat due to a sale of the house, so ventilation was a big issue, so know your environment!
Now, it’s time to scuff. We like using red scotch brite scuff pads. This will help the primer and new paint bond properly. You can use (and you may have to) sandpaper with more grit to get cabinets to a smooth surface- but once you do, oil primer may be needed.
Don’t forget to sand the cabinet boxes, too! Even if the doors and drawers are the main focus, the boxes need the same TLC.
Do you need to Prime before painting cabinets?
YES!! This step is a must to ensure your new paint job lasts.
When it comes to primer, you have a couple of options:
- Oil-based primer: This provides excellent adhesion and stain-blocking properties, making it a great choice for cherry cabinets. Just be aware that it has a strong odor and requires mineral spirits for cleanup.
- HYbrid primers- We LOVE Stix- it is a modified primer that sticks to dam near anything.
- Latex primer: Newer latex primers offer impressive performance and are easier to work with. They’re a great eco-friendly option and clean up with just soap and water.
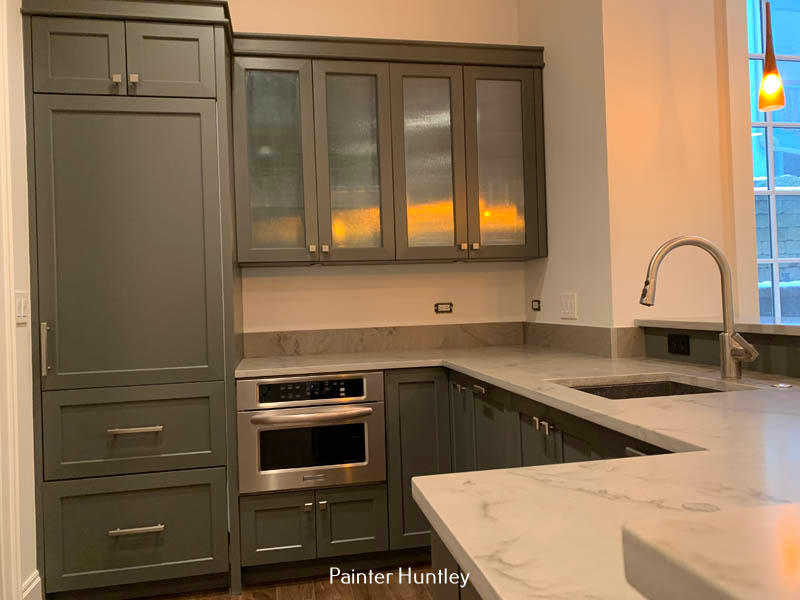
Regardless of which primer you choose, apply it in thin, even coats, following the manufacturer’s instructions. Make sure to pay extra attention to any areas that were previously stained or painted, as those will need a bit more primer love. This Kitchen in Elgin had issues die to previous owners cooking with a lot of oil/grease- oofta the oil primer we had to use!

For a super-smooth finish, lightly sand the primed surfaces with 320 or 400-grit sandpaper before moving on to the paint. (and between each layer or coat of paint)
Applying Paint to cabinets
Lets paint! Unleash your inner Rembrandt and transform those dated maple cabinets!!.
When it comes to paint, we recommend a high-quality satin or 20 gloss sheen. These sheens are durable, easy to clean, and provide a beautiful, subtle sheen that complements the smooth maple wood beautifully.
As for the actual painting process, What to use a brush and roller or sprayer? Sprayers are best left to someone with experience. When we train a cabinet painter- it takes about 5 jobs (200 plus pieces to get the technique right)
Have a clean work space! NO;
- animals with loose hair
- open doors
- outside in the yard
- in dirty areas
- by high traffic areas
- exposure to water
Every door or drawer needs to be either hung or laid flat.
For brushes- Use a high-quality brush for the edges and corners, and a small micro fibre roller for the larger flat surfaces.
Apply the paint in thin, even coats!! Allow each coat to fully dry before adding the next. Again sand before each coat. Slow and steady….
Once the doors and drawers are complete, move on to the cabinet boxes. Take your time and be sure to get into all those nooks and crannies. Some people ask- yes you can paint the inside of the cabinets for a polished, cohesive look. If you have glass doors- you may have to do this for sure.
Putting the kitchen back together after painting
The hard part is done! Now it’s time to put your cabinets back together and add those final finishing touches.
Start by reattaching the cabinet doors and drawers, making sure everything lines up perfectly. If you labeled each piece during the disassembly process, this should be a breeze.
Next, replace any hardware, such as pulls or knobs, that you removed during the painting process. This is a great opportunity to update the look of your cabinets with some new, coordinating hardware.
Finally, give your freshly painted cabinets a good once-over. Check for any missed spots or drips, and touch up as needed. Then, step back and admire your handiwork – those cherry cabinets are looking better than ever!
Conclusion: Congratulations, you’ve completed your cabinet painting project! Whether you tackled this DIY-style or called in the pros at Dfranco Painting and Wallpaper, you should be incredibly proud of the transformation.
By following our step-by-step guide, you’ve learned the ins and outs of painting cherry cabinets, from proper preparation to the final brushstrokes. Your kitchen is now the envy of the neighborhood, and you can enjoy the fruits of your labor (or, you know, your spaghetti sauce) for years to come.
Remember, painting cabinets is no small feat, but with the right tools, patience, and attention to detail, you can achieve professional-level results. And hey, if you ever find yourself in a paint-induced haze, wondering if you’ll ever be able to open your cabinets again, just take a deep breath and remind yourself – it’s only paint, and it can always be changed.
So, go forth and paint those cherished cabinets with confidence! And if you ever need a little extra guidance or want to hand the project off to the experts, you know where to find us.
Happy painting, and may your kitchen forever be a showcase of your hard work and impeccable taste!
For more information on cabinet painting techniques and tools, check out these helpful resources:
- This Old House’s guide to painting kitchen cabinets: https://www.thisoldhouse.com/kitchens/21016704/how-to-paint-kitchen-cabinets
- Family Handyman’s tips for a professional-looking cabinet paint job: https://www.familyhandyman.com/article/how-to-paint-kitchen-cabinets-like-a-pro/
- Sherwin-Williams’ cabinet painting guide: https://www.sherwin-williams.com/homeowners/how-to/projects/how-to-paint-kitchen-cabinets
- Benjamin Moore’s cabinet paint selection: https://www.benjaminmoore.com/en-us/interior-exterior-paints-stains/products/cabinet-furniture-paint