
Stop sanding cabinets- a better way to cabinet prep
If you’ve ever watched a kitchen makeover on TV, it might have felt a bit like Star Wars: one moment everything is calm, and the next there’s a flurry of action—doors coming off hinges, sanders buzzing like lightsabers, and a final reveal that leaves you wondering, “How’d they do that?” Well, cleaning and sanding cabinets is a big part of that transformation magic. Today we are gonna show you a beter and faster way to get cabinets ready for painting, but 1st STOP SANDING CABINETS!
Here in the Midwest, we know a thing or two about changing seasons. Our homes endure wild weather, from blazing summers to sub-zero winters (the kind that make you quote Frozen). Just like you’d winterize your car or throw a coat of wax on it in the summer, sanding your cabinets before painting is the prep work that keeps your kitchen looking fresh. So buckle up—let’s break down exactly why sanding is so important and how it helps you transform those tired, old cabinets into a new kitchen showpiece.
Table of contents- what we will cover today for quick reference
- Stop sanding cabinets- a better way to cabinet prep
Why sanding matters
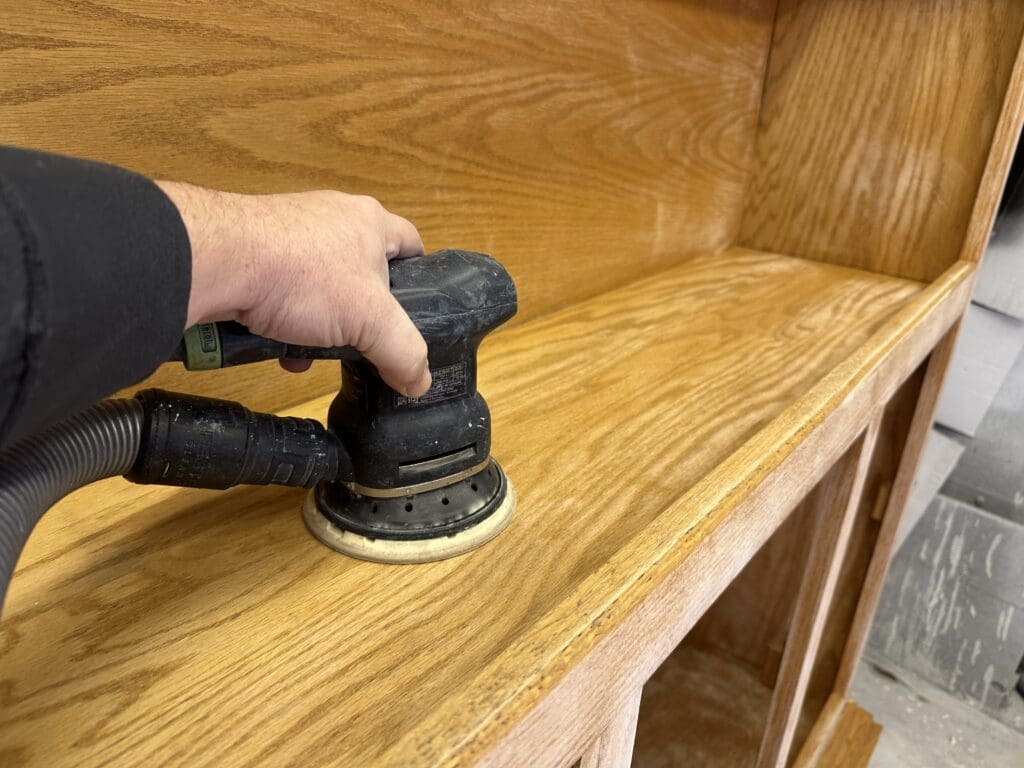
Think of sanding like the opening act before a big concert. You could skip it, but you’d miss the lead-up that sets the stage for a great performance. Sanding roughs up the surface, allowing primer and paint to adhere better. A quick “scuff-sand” is typically enough to break the seal of a glossy finish.
- Better Paint Grip: Sanding ensures paint or primer won’t peel or chip within a few months.
- Smooth Finish: A light sanding can help smooth out minor imperfections or bumps.
- Longevity: Your cabinet paint job will last longer, saving you time and money in the long run.
In the video, we watch how sanding transforms an old finish from shiny and slick to slightly matte, giving the primer a place to bond. Without that step, you might end up with paint flaking off like old wallpaper, which can be more annoying than being stuck in traffic during rush hour on a Friday.
FAQ’s about sanding and cleaning cabinets
Let’s address the biggest questions folks type into search engines when they want to paint their cabinets.
Do I Really Have to Sand?
“Do I have to sand?” is like asking if you really need to tie your shoes before running. You could try it without tying your laces, but the odds of tripping and falling on your face are gonna go up!
Similarly, not sanding raises your risk of poor paint adhesion. The result? Chipped paint and a finish that might need redoing sooner than you’d like. If you’re still on the fence, think about your own peace of mind. One weekend of sanding can save you a world of headaches later.
Although there are time that we need to sand, and you will too, we say to scuff the surface is the best, when using the right products.
What Grit Sandpaper Should I Use?
This is one of the top head-scratchers for DIYers. Generally, you’ll start with 220-grit for lightly sanding or removing a gloss. If you need to smooth out bigger scratches, you might start with a slightly coarser 150-grit, then work your way up to 220, 320 and 400-grit for a fine finish. (as we will discuss later for cabients, we have a better way!)
Here’s a quick guide:
- 100 – 120 Grit: Heavier sanding or removing minor blemishes.
- 150 – 180 Grit: General-purpose scuff sanding to prep for paint.
- 220 Grit: Final pass for a silky-smooth result.
- 320-400 Grit : for between coats to remove dust
How Much Do I Need to Sand?
One of the biggest misconceptions is that you have to sand your cabinets down to bare wood. Thankfully, that’s not necessary.
All you really need is to remove the sheen.
Sand enough to dull the glossy finish so the primer can stick. If the current finish has deep scratches or dings, spend a little more time evening them out. But don’t wear yourself out trying to remove every bit of stain or paint that’s already there—just make it dull, remove the shiney surafce.
Do I Have to Clean the Dust Off?
Yes, yes, a thousand times YES!
If you leave sanding dust on your cabinets, that dust ends up trapped under your primer or paint like little snowflakes that ruin your smooth surface. Imagine someone dancing in a pile of confetti and then walking across a freshly mopped floor. Everything gets messy, real fast. Use a vacuum or a damp cloth to wipe down all that dust before you move on to priming.
What if My Cabinets Are Already Painted?
If your cabinets are already painted but look a little worn or chipped, you’ll still want to sand them lightly. This helps level out any rough paint edges and gives your new paint layer the chance to bond.
If you have areas where paint is peeling off, scrape those sections first, then sand to smooth it all out.
Think of it like giving a second chance to an old Toy Story figurine—you’ll make it look brand new again.
Common challenges of Cabinet Prep
Common Challenges (and How to Overcome Them)
How much of a mess, how long will it take, can i do this? Sound Familiar? Yes it is work, for the avergae home owner, it will take several weeks. You can read about a DIY gone wrong article we wrote some time agao here..
Time and Effort to paint cabinets
Sanding can be a bit tedious. It might feel like you’re reenacting The Karate Kid by waxing on, waxing off for hours. A good approach is to break the project into sections—tackle the upper cabinets one day, the lower cabinets the next. This way you avoid burnout and keep each stage manageable.
One door at a time, one drawer at a time.
Mess and Cleanup of cabinet prep
Dust gets everywhere, just like glitter after a craft project. That is why we say wet sand using our process below.
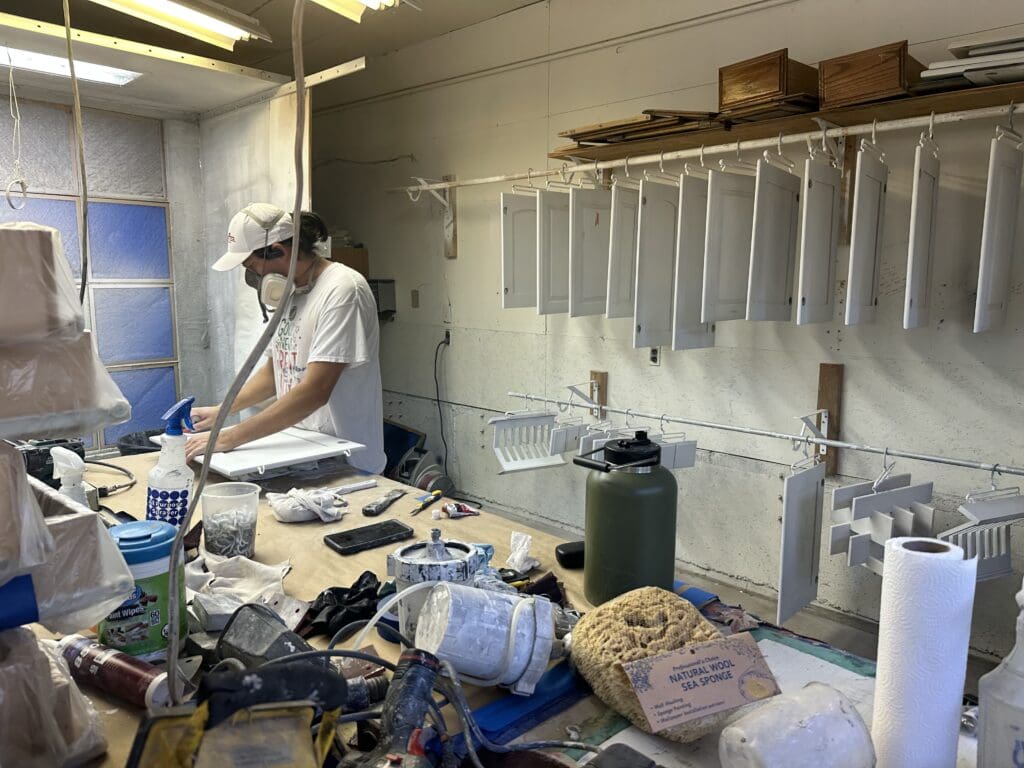
BUT! If you go down the sandpaper route…Lay down tarps or old sheets to catch the dust, and always keep a vacuum or tack cloth handy. Once you get in the habit of cleaning as you go, you’ll be amazed how much easier it is to keep your workspace tidy.
Fear of Ruining Cabinets
It’s easy to worry you’ll sand too much or leave permanent marks. Fortunately, sanding is pretty forgiving if you stay with the recommended grit range (220). If you’re unsure, start with a lighter grit and practice on the back of a cabinet door.
It’s like that first time you tried riding a bike—start slow, and you’ll get the feel pretty quick.
Stop Sanding- scuff the surface!
So IF you have not watched the video- ere is the main point of todays article. Although you can sand- sanding can creat problems, and a mess. It also is not needed in many circumstances.
We use scotch scuff pads and dish soap in 90% of our cabinet prep work. (think of thse green claning ads use scrub dish pans with.
Spray the surafce with soapy water, scuff the surface- you are cleaning and scuffing in one step! You will fell the scuff pad grab the surfacem you will see white from the clear coat and the brown from dirt. When done, light spray again, wipe clean and allow to dry!
Your kitchen Transformation
Cleaning and prep is a wise guide along your path—pointing the way toward a successful cabinet makeover that looks great and holds up to everyday life.
It’s easy to dream about a beautiful new kitchen but feel stuck in the “how.” By showing you each step—especially the sanding part—you’ll be empowered to make informed decisions. Whether you choose to do it yourself or call in a professional, you’ll know exactly why sanding matters and how it will elevate your project.
Cabinet Painting Success Story!
One of our potential customers in Hampshire, decided to go about the cabinet painting them selves. Part to save money, part to say they did it themselves, and then mostlty becuse they wanted to save money.
They wanted a bright, modern feel but feared that sanding and painting would be too big of a chore. They watched our youtube videos, read the process we use from our estimate, used the same products we use, and decided to use their garage to paint cabinets themselves.
After 4 weeks, they had a kitchen that looked brand new! How did it look, from pics they shared, it looked prettty good. Would they do it again? Brian says – “now way in hell” .. we both laughed.
Hiring a cabient painter
If you decide to skip the DIY route, finding the right pro can be a bit like selecting a favorite pizza spot—there are plenty of choices, but not all are created equal. Look for a company that:
- Explains their sanding process up front.
- Uses top-quality primers and paint.
- Prioritizes prep work (like cleaning and dust removal).
- Has before-and-after photos showcasing their work.
Don’t be shy about asking questions—this is your home, after all. Ask them to walk you through their approach. If they’re vague or brush off the importance of sanding, that might be a red flag. A great painter (or painting company like us- yes shamless plug) will be happy to explain each step, ensuring you feel confident about your decision. You can reag an article we wrote about hiring a contracotr here
Highlights to hiring or painting cabinets yourself
When it comes to cabinet painting, cleaning and prep works is the unsung hero—often overlooked, but so important to a finished product that will stand the test of time.
But you dont have to resort to sanding the wood.
Rough up that existing finish for setting the stage for your paint to look better and stay put. Whether you’re teaming up with a professional or rocking out to your favorite tunes while you DIY, remember the immortal words of Journey: “Don’t stop believing”… in the power of a good scuff-sand.
Key Reminders:
- Use 120–220 grit sandpaper to remove gloss and prep your surfaces.
- Always clear away dust before priming.
- You don’t need to sand down to bare wood—just break the surface.
- Hiring a pro? Make sure they care about the prep work as much as the final coat.
If you have any questions or need a bit more direction, don’t hesitate to reach out. With a little elbow grease (or a bit of professional know-how), your cabinets will be ready for their next close-up. Now, queue up some music—Eye of the Tiger, perhaps?—and let’s get sanding!