Caulking wood trim before painting?

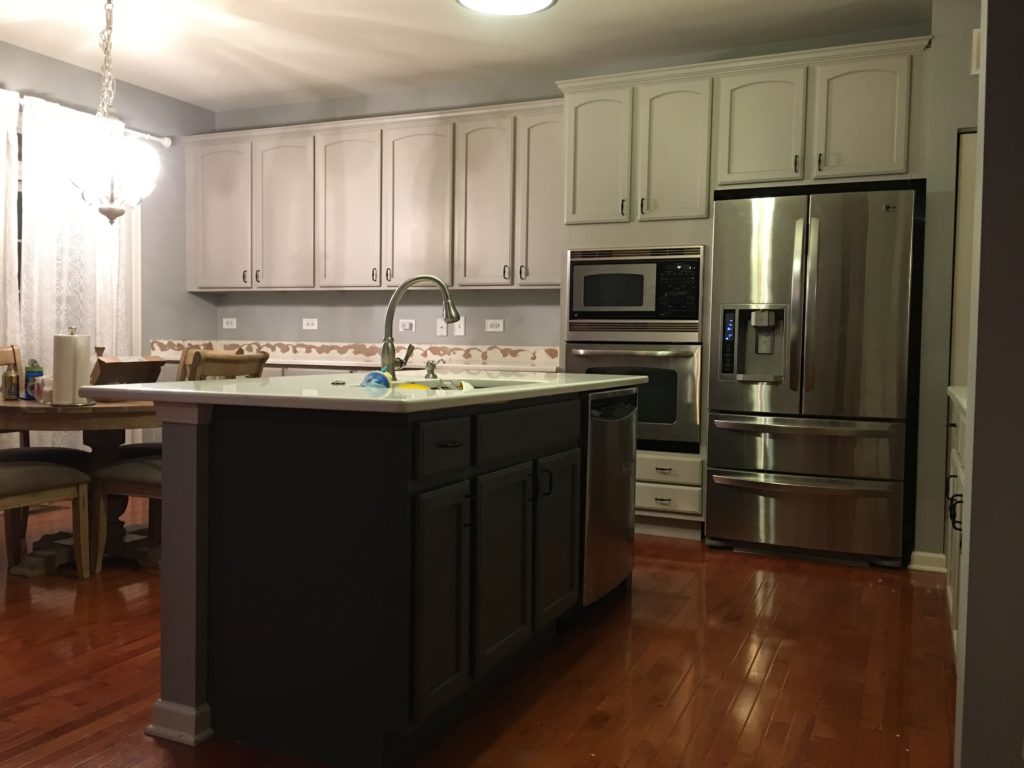
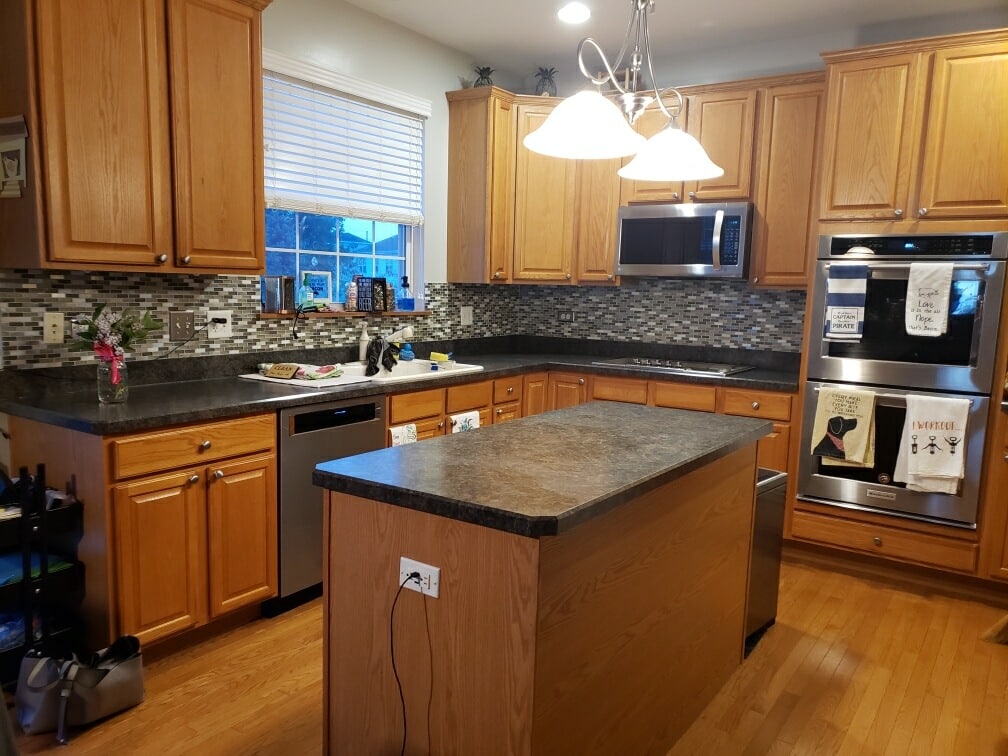
Do you have wood stained trim in your home? Are you painting your walls? Do you hate the way the wood trim has gaps? Well- these issues and concerns are today’s answered question. Should I be Caulking wood trim before painting?

Hello everyone, thanks for taking the time to read todays question. I am David with Dfranco Painting and Wallpaper in Huntley, IL. This questions comes from a home we are painting in Elgin, IL.

Why is my trim not caulked?

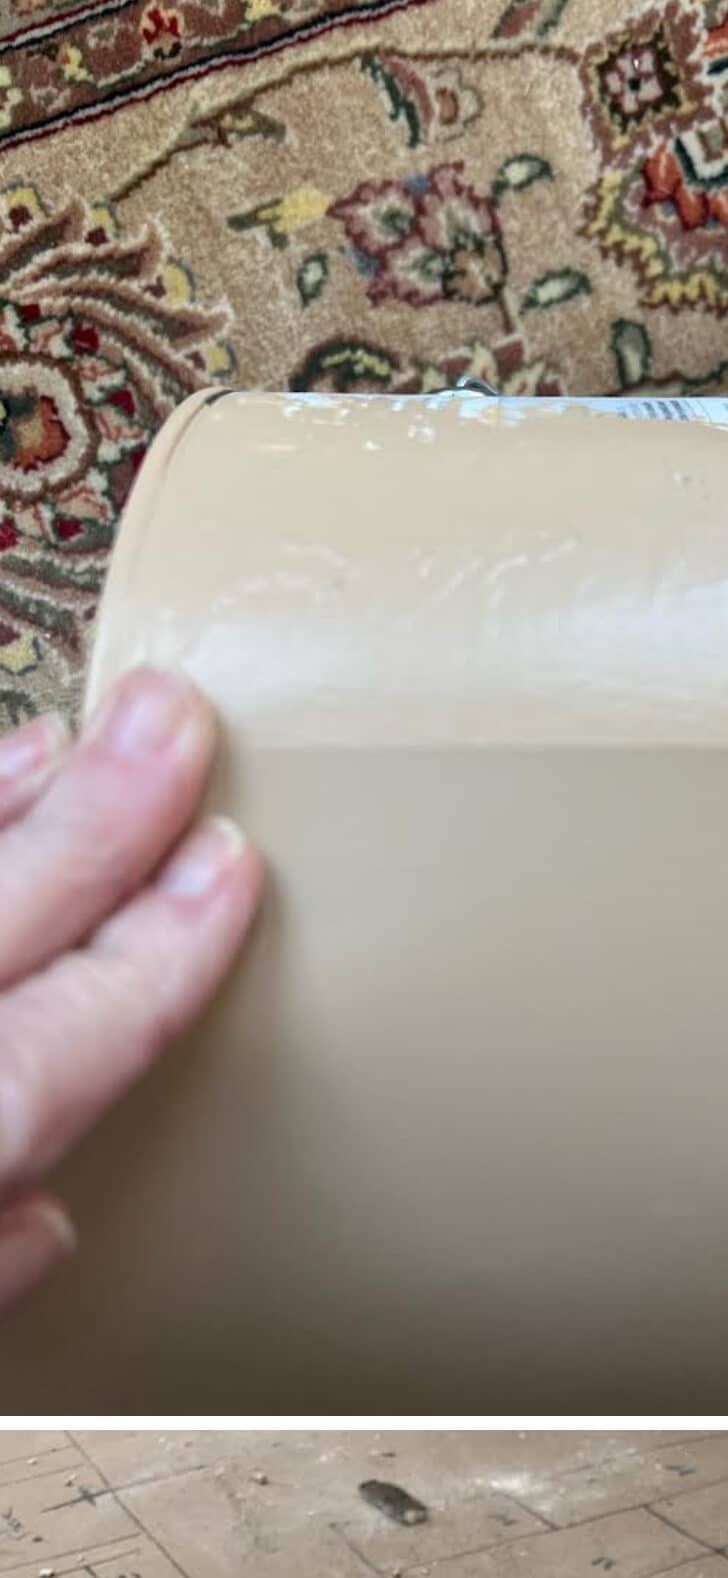
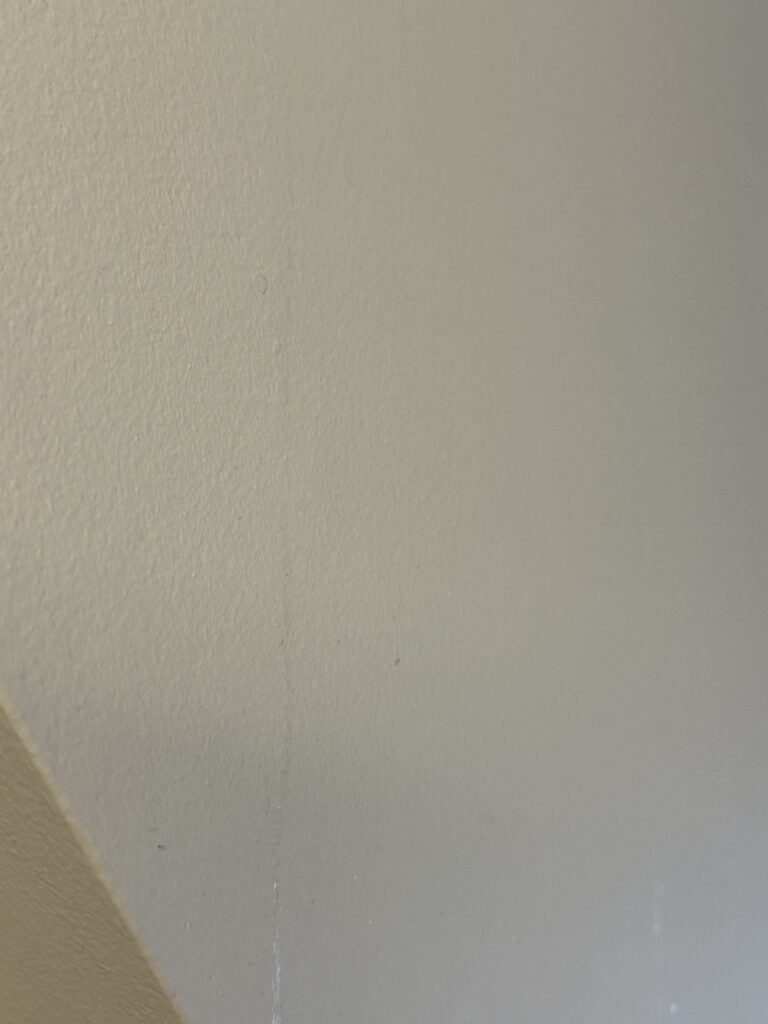
If you have stained trim, 99.9% of the time, the trim is not caulked to the wall. The result is a gap between the wall and trim. I am not a fan of the gap between trim and walls either.

(if you have painted trim and it is not caulked- then someone dropped the ball and did not do their job)

You can caulk stained trim, but it is quite a tedious step by step process. We can go over how, but we just wanted to make sure you know not caulked stained trim is very normal.

If you are getting ready to paint your walls a new color or maybe just doing touch ups, then caulk wood trim before painting may be on your to-do list.

Should I caulk wood trim before painting?

The should question is always a hard question to answer. Should, could or would can be very subjective as they reflect personal choice.

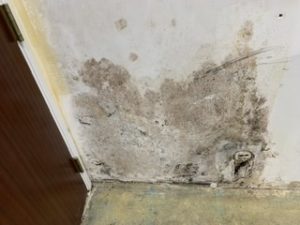
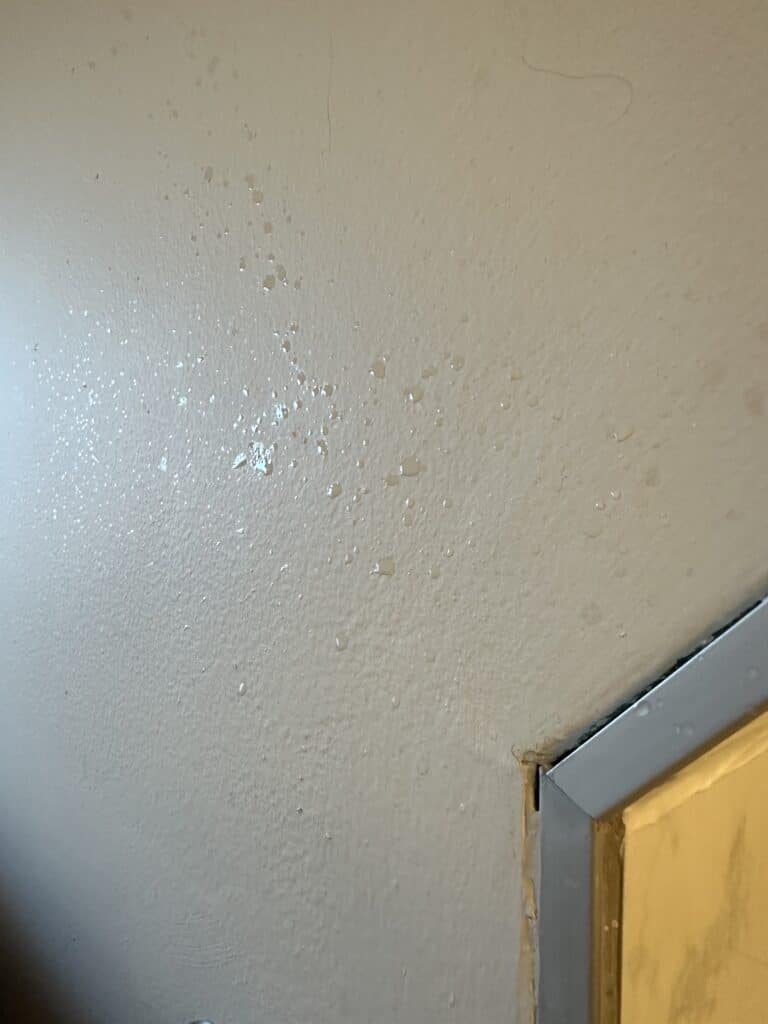
I am not a fan of the gap as I have said earlier. Gaps in trim, if dark can be easily ignored or overseen- as the dark gap kind of goes away, it is not unsightly to the eye for the most part. These gaps can, however, be nasty looking if the trim was not installed correctly.

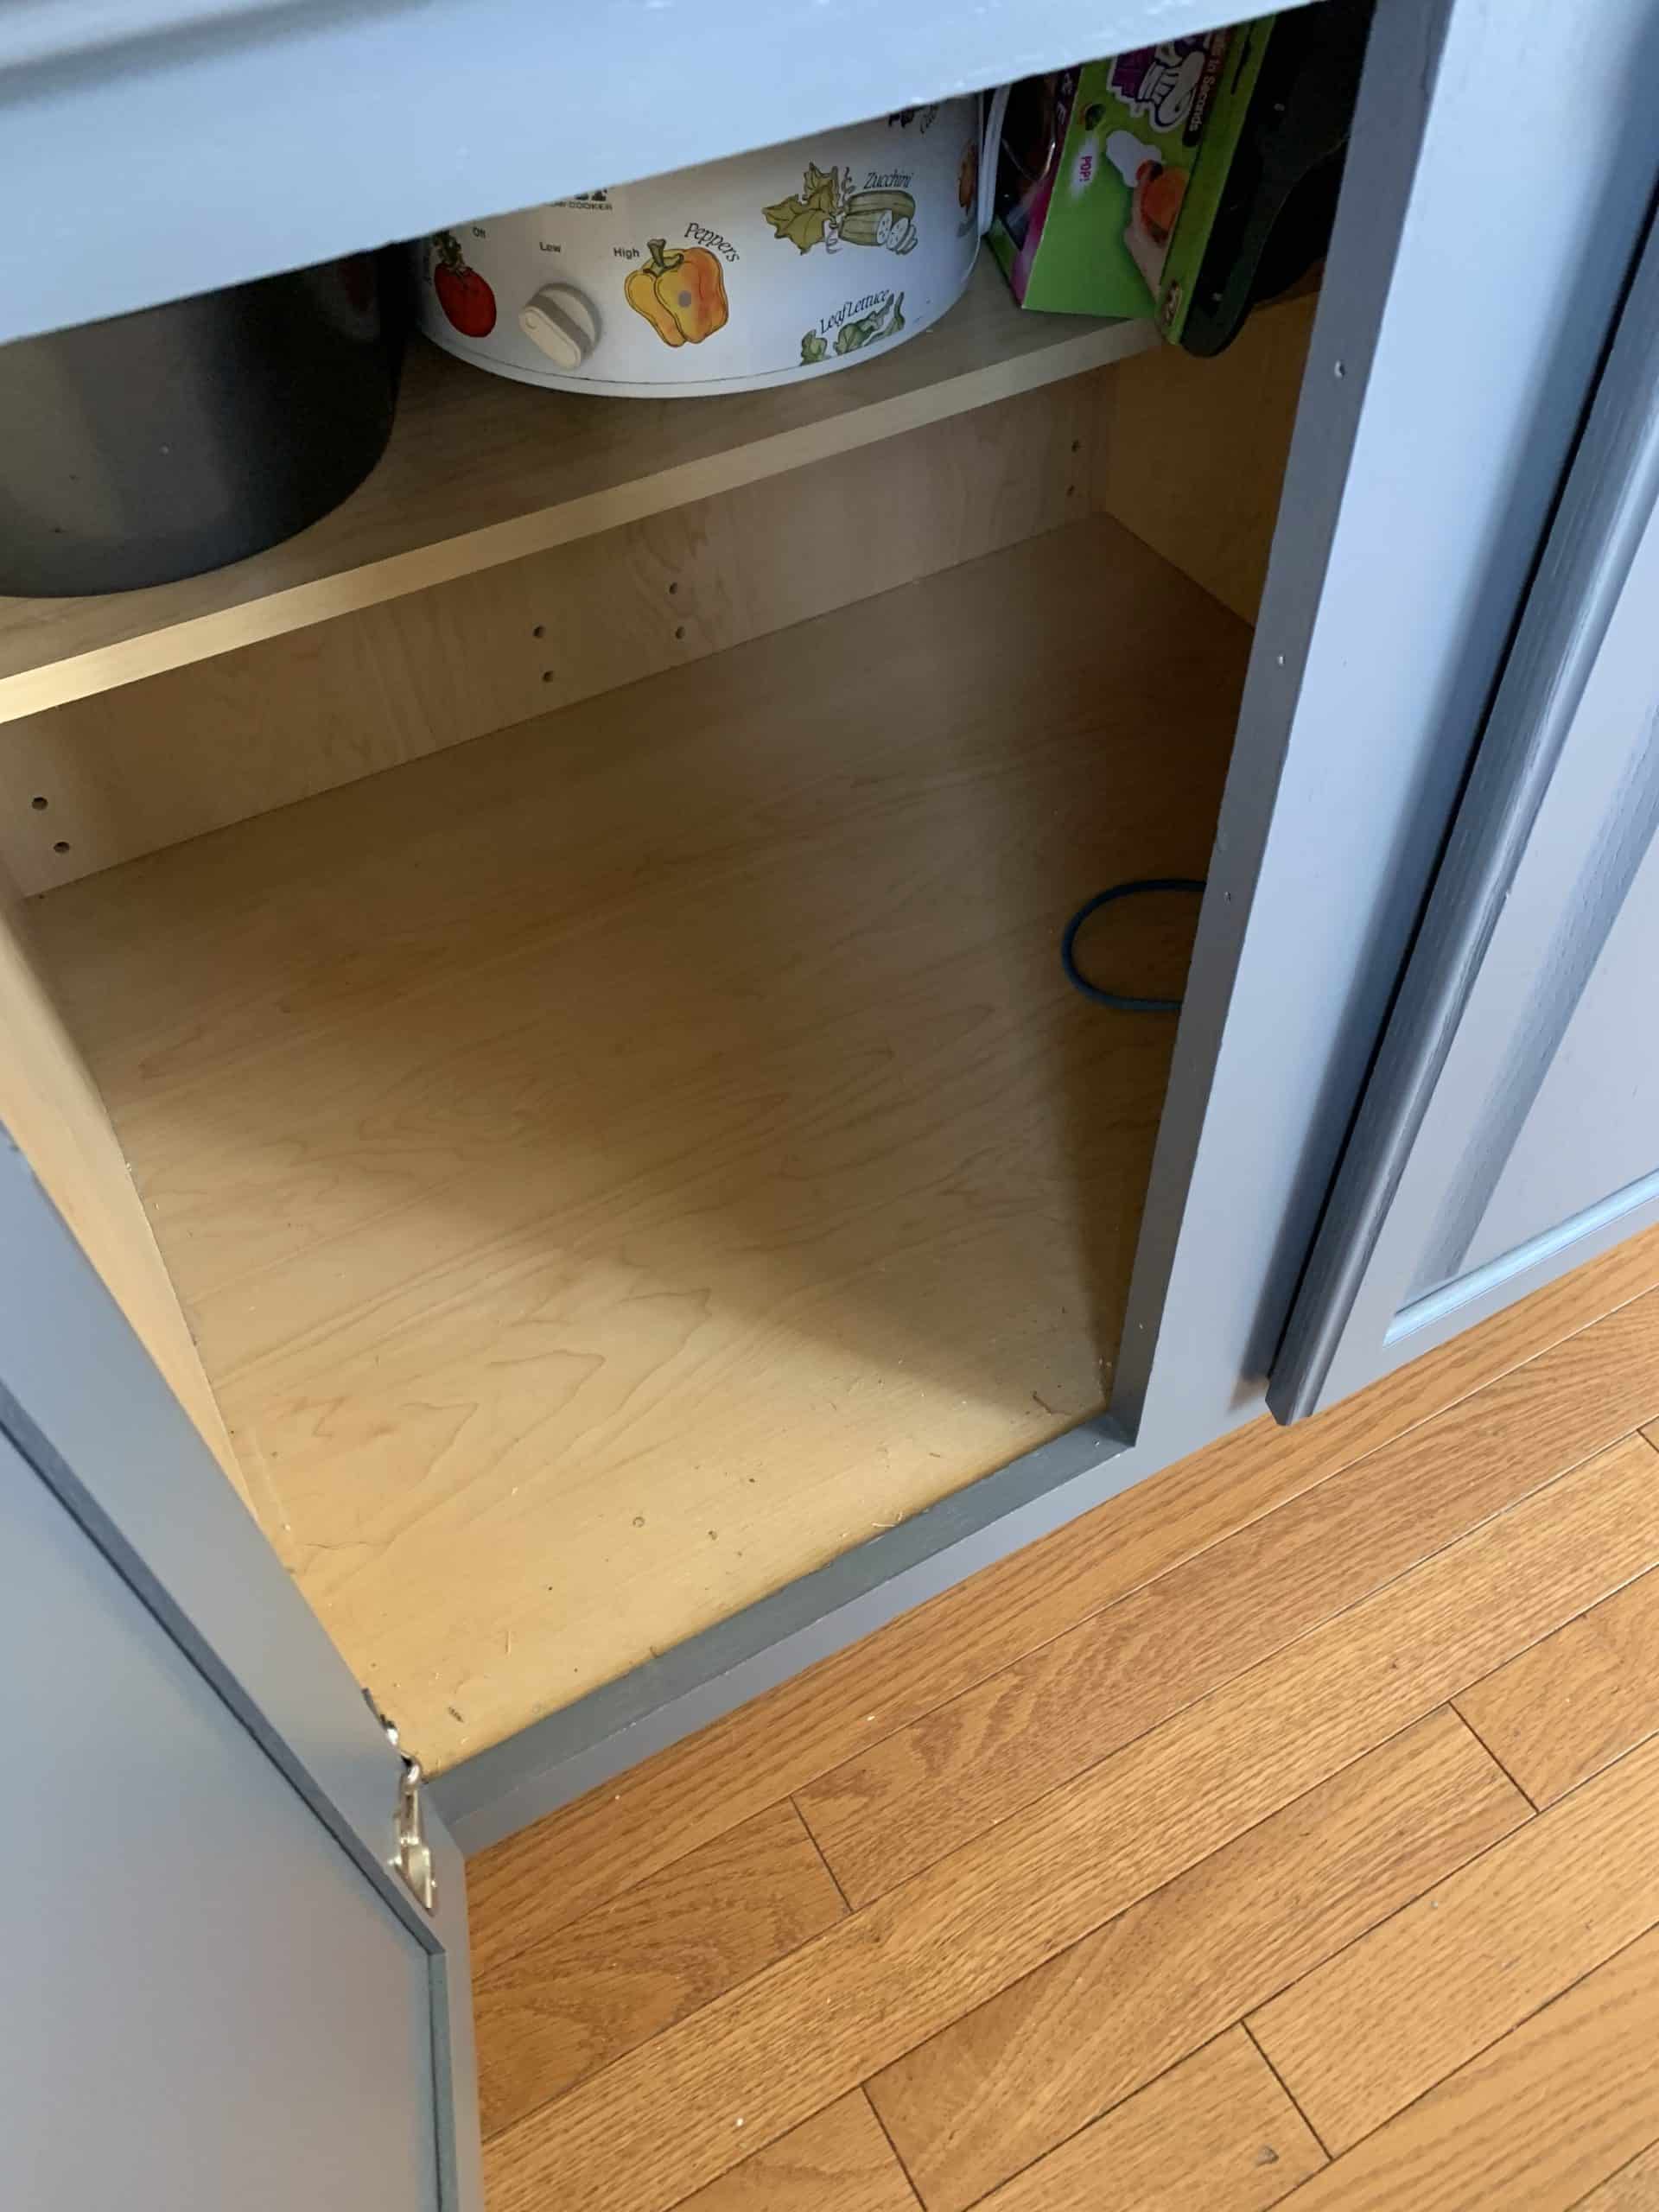
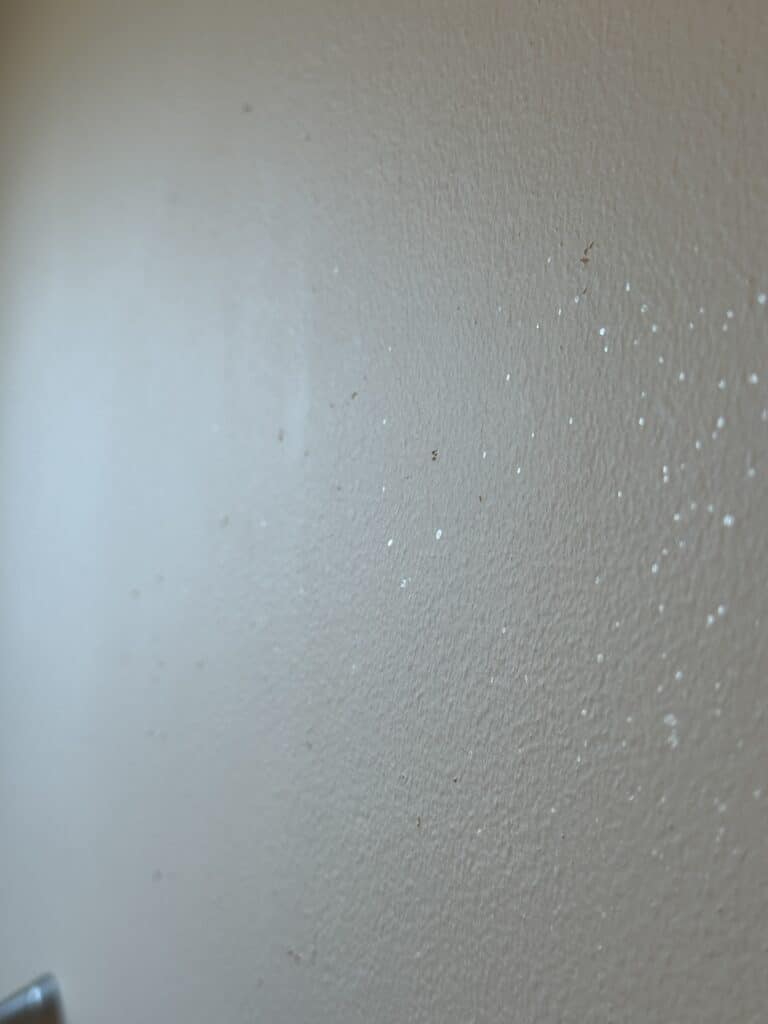
Gaps between walls and trim can result in dirt/dust/debris getting between the wall and trim. That gap in the trim can be difficult to get clean as a vacuum cannot easily reach between small spaces (think tight spaces in your car when trying to clean it.

Items needed…

So here is the quick and dirty… Items you need to caulk wood trim before painting:

  • clean rags
  • water
  • 5 in 1 tools
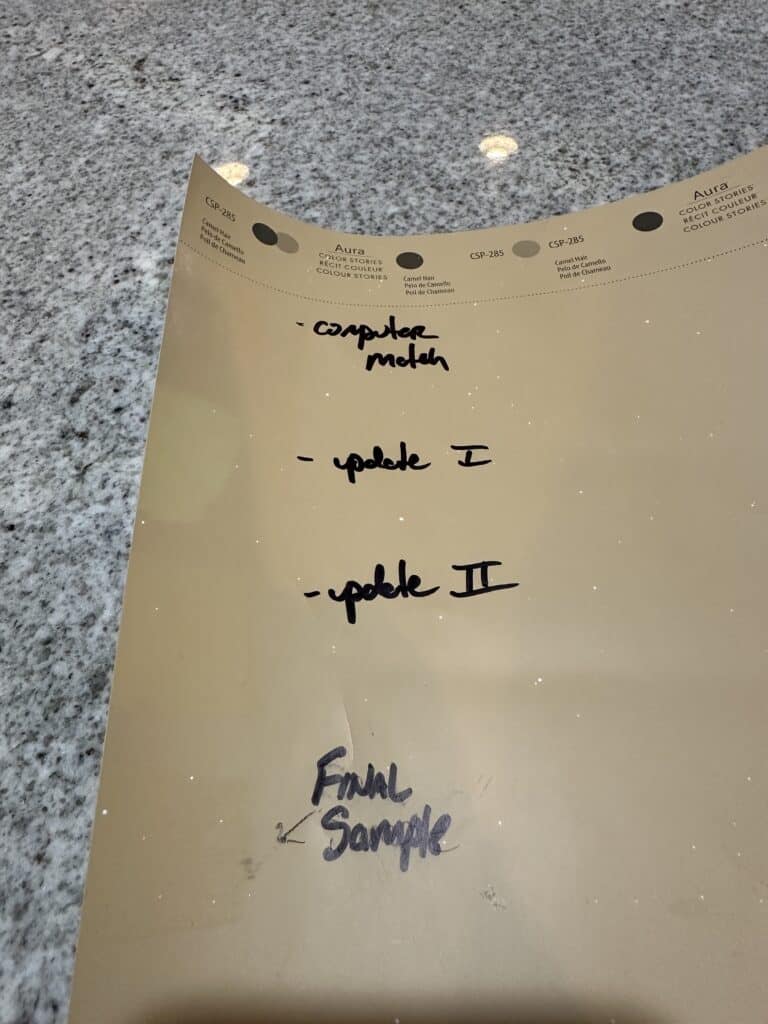
  • solid paintable colored caulk- the same color as your wood trim
  • drop cloths or masking paper
  • masking tape

You need clean rags so you can clean the trim before Painting. Damp rag works great, if there is dirt, grease grime etc, then you made need a cleaner so the tape and caulk stick to the wood surface.

We wanted to make sure you see that you need paintable caulk- do not use silicone caulk- as it typically is not paintable, it smells like vinegar and takes a long time to cure.

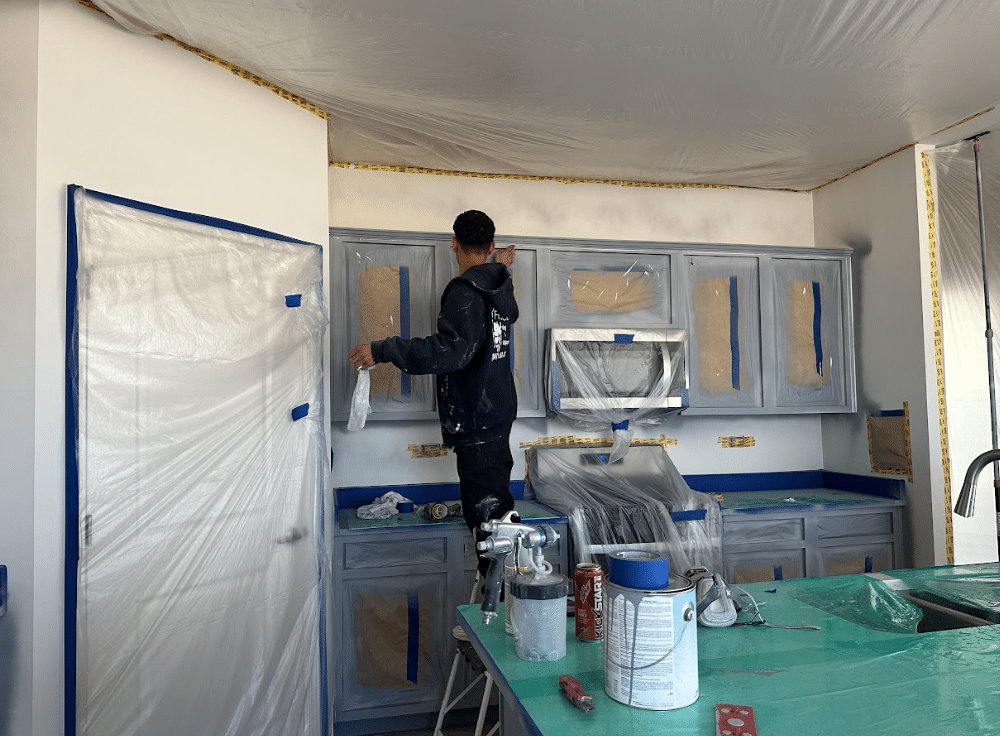
How to caulk your trim before painting walls

Just to make sure, we are only talking about caulking trim that is stained wood, not painted trim. There is a HUGE diffference.

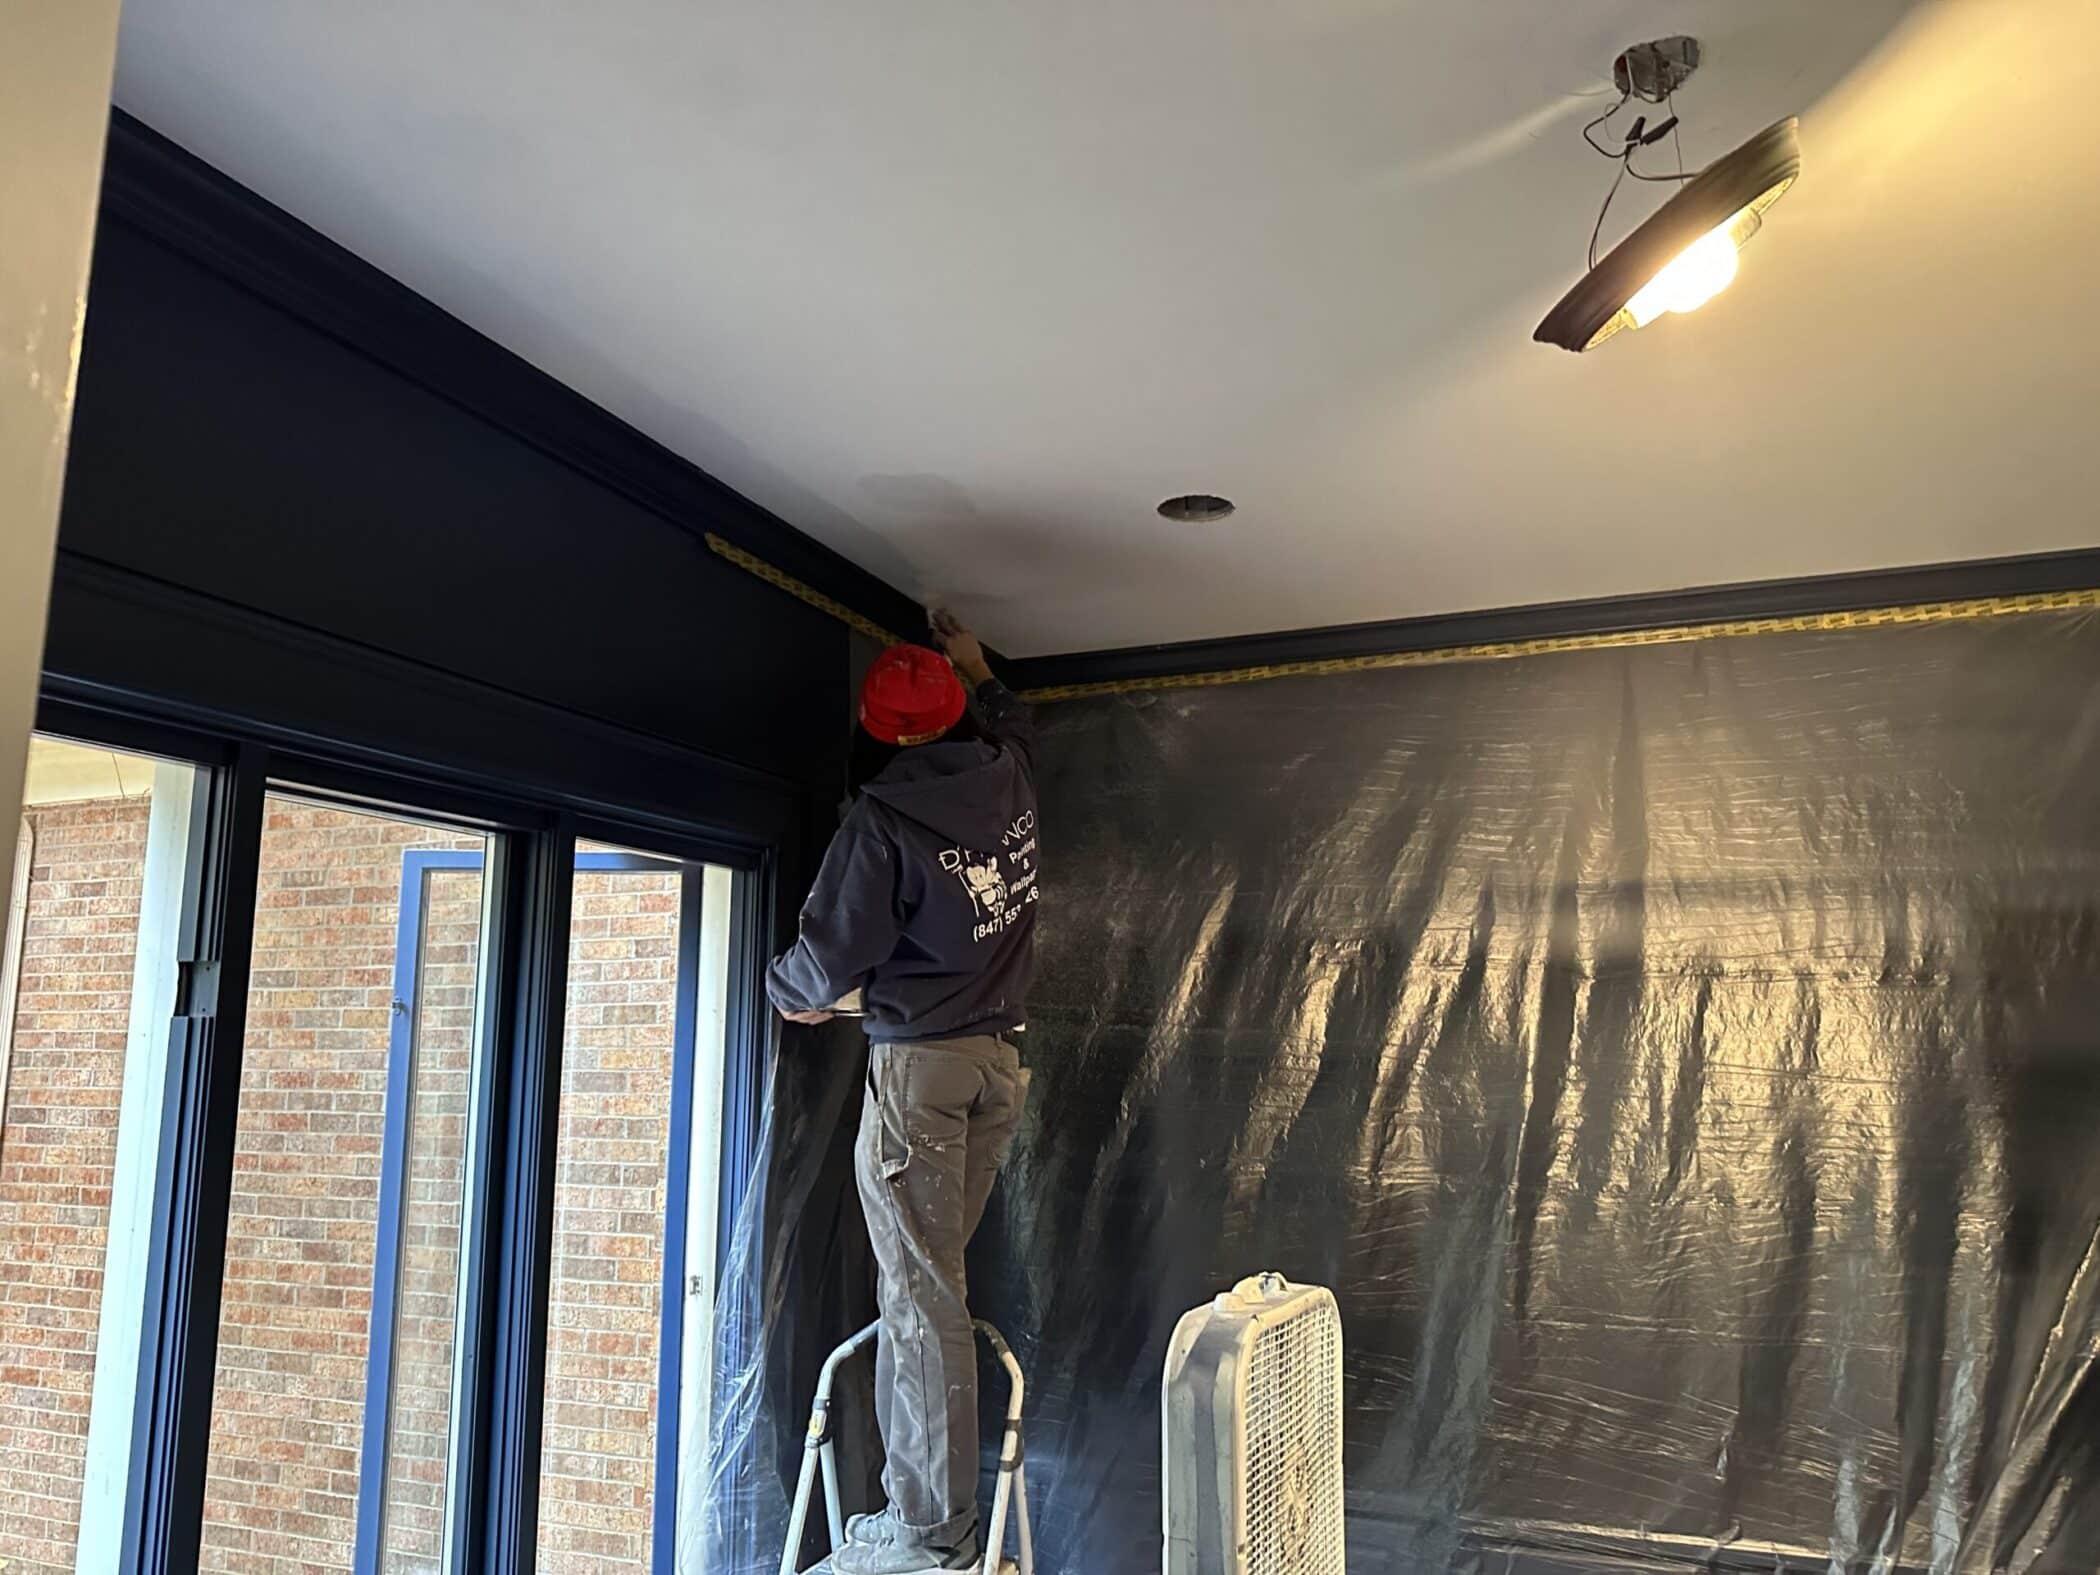
So 1st thing is cleaning. You need to make sure the wood trim and the floor are clean so tape can stick to the surfaces

once everything is clean.. then you can start taping. We really like blue frog tape. It sticks, and removed easy leaving clean lines. Tape the edge of the trim so you can see the very edge of the wood and leaving the gap to get filled with caulk. We leave the slight edge so there is a place for the caulk to full stick too.

Next caulking.. cut out a small hole- too big and you have a mess to deal with. Just use enough to fill the gap, then wipe smooth with wet rag to get clean line.

Once a area is caulked, then pull the tape. You dont want the caulk to stick to the tape! Once tape is pulled, allow the caulk to dry overnight.

The next day, you will have to re-caulk the area before painting. Dark caulk will either need 3 coats of paint or primer to cover the dark color caulk before painting colors such as white.

What if I have white trim?

We will save this how to for another day, but here is a old video on this…

Got painting questions?

we have answers! let us know if you have a specific question we can help with!

Top 5 Issues with Painting Oak Cabinets

If you have a house that was built in the 1980-2005, odds are you have oak cabinets. Ok, maybe you have maple or cherry.. but most homes have wood cabinets. One of the best ways to update the look and feel of your home is to paint your home. The next best improvement is updating your kitchen cabinets. There are several ways to update your kitchen and cabinets, but the best value is to paint your kitchen cabinets. If you are going to paint kitchen cabients or bathroom vanities then you should know the Top 5 Issues With Painting Oak Cabients!

Thanks for taking the time to read this article and check us out! I am David Cook, with Dranco Painting and Wallpaper, here in Huntley, IL. Today’s title is a question we are asked almost every time we provide an estimate for painting Oak kitchen cabinets. So lets take a peek at a video of a sample oak cabinet door, then look at some issues you may be facing- or asking about.

Will painted cabinets peel?

ok, so this is by far the most popular or common question we are asked hands down. Peel paint on oak cabinets, on walls, on trim is all caused by the exact same issue- Poor preparation.

Water damaged sink panel

When a surface is dirty it is going to be very difficult to get paint to stick to the surface. If you have a painted surface that is very slick-shiney etc, then once more you will have a very difficult time to get paint to stick to that surface.

When we prepare a surface for paint, we clean it, dust it, clean it where needed and then we prime it. Primer gives the surface a uniform appearance and readiness to accept paint. In the case for cabinets, the bonding primer sticks to the wood cabinet, which allows the cabinet paint a surface to bond too, preventing peeling.

Are my painted cabinets going to chip?

This question is a issue and a subject to much frustration. Think of this as when you buy a car- is Honda going to warranty a repair from a rock that chipped your car while driving on the freeway? The same is true for painted wood- blunt force trauma to wood causes paint to chip, there is nothing you can do about it. You cannot prevent paint from chipping either.

You an read more about chips and peeling in an article we wrote some time ago..

Using the wrong paint for cabinets

There are certain paints for certain applications. You don’t use automotive paint in a bathroom. Similar- you don’t use wall paint to paint cabinets.

Cabinets that re going to be painted should use a paint that is made for cabinets. There are several brands and several types. We use hybrid lacquer or Urathanes. Do not use Acrylic or oil-based products. If you want to know why- ask us and we can do another blog post about that!

I can see brush and roller marks on my cabinets

This really isn’t as much of an issue as much as it is a preference. I really do not brush and roll cabinets. I do not like seeing the brush or roller marks. Brush and roller marks happen for several reasons:

  • using bad brushed leave marks
  • cheap rollers leave laps or bubbles
  • rough surfaces give un even surfaces leaving marks
  • if you use a paint not meant to roll, you will leave lines
  • the paint dries to fast
  • leaving wet painted cabinets in a dirty area- dust/bugs

I could probably list a few more of these reasons, but the biggest reason is if you use a brush or roller you will leave brush or roller marks. Duh?-maybe but that is the reality.

I hate the color of my cabinets

this one always kills me. Before you paint- look at the color! If you say I don’t really care- then don’t complain about the color! If it didn’t happen I would not be writing about it. People see a tv show, hear about a color from friends, or someone sends a picture and think I want it!

Every phone takes pics a bit differently which does affect the look and appearance of the photos being taken. The lighting in your home makes a difference in the color of the paint you use. Surrounding accent colors, flooring, drapes, etc also make a difference in the colors in your home.

This is where we find the free interior designer makes a huge difference. They know and will help you make the right choice!

How can we help?

If you are thinking of painting cabinets, please let us know what we can do to help! We want you to enjoy the process and the results!! Although we are in Huntley, we serve all of our surrounding communities such as Pingree Grove, Algonquin, Carpentersville, and Elgin to name a few.

Repainting White Trim!

If you are like many homes in our area, you have white trim in your home. After several years, one thing you will start seeing is gaps, in holes and wear and tear that make that white paint look pretty bad. The question is What do I need to do before Repainting White Trim?

Good day everyone, I am David with Dfranco Painting and Wallpaper here in Huntley, IL, with todays question from a home owner in Elgin, IL where we are repainting the entire home. Someone painted the trim white in my house and it looks like crap- how do you fix it? How do you get the trim ready to repaint it white?

Clean surfaces before you paint them!

The biggest problem with repainting anything is when the surfaces are not cleaned.

We are just going to use a wet rag, to wipe the surfaces down, dusting alone is not enough as there are typically other types of dirt or residue that the vacuum alone will not clean away.

You can use a cleaner, but just use something that is safe to paint. Do not leave oil residue and not leaving it wet! (Vinegar and water are the best)

Recaulking painted trim

For most homes, painted white trim will start to have gaps or crack in them as they wear. The wood trim will also expand and contract depending on the seasons which can affect the seams and appearances of gaps.

If there is caulk there already and it is bulging out or peeling, you need to clean that away, cut it out, pull it out etc. If the caulk is in good condition, not peeling etc, then you may just have an area where it was not caulked very well or it shrank.

Once the old caulk is removed, then you can start re caulking those gaps. We use elastomeric caulk, which has some adhesive properties in it but more importantly, it will expand and contract to help not bring gaps back.

painted white trim-caulked and ready for paint

Filling Nail holes in painted trim

When trim is painted white (or any other color) the nail holes either were filled. Hope fully you do not have a case where someone tried to fill the holes. I say try cause the really bad attempts result in the cracks, gaps or bumps. It is caused from filler coming out, the holes were filled but never sanded, or there will be crescent moon shape gaps in the trim .

What do you do 1st? Clean it. If you have holes to fill fill them using a spackle or wood filler. Just make sure you sand smooth, then spot-prime those areas where you filled holes. Finally, you can paint!

Type of paint to use for painting trim

This can be a loaded question, so I will just answer it as to what we use. We primarily use Sherwin Williams Proclassic semi-gloss paint. We have also used Emerald Urethane paint as well. Both are good, sheen and time is why we pick one product over the other. Each has a different sheen level when dry, and pro classic dries fast!

Should I paint my trim using a brush or spray my trim?

This will be a matter of preference. (for the most part) Sprayed trim just looks awesome. Spraying trim also means you are committed to covering everything in your home, having dust, debris and smell longer. Trim that has been sprayed looks and feels exactly as you think it should- smooth and shiny!

Painting your trim with a brush is fine. More times than not, you will see brush or roller marks, it take a long period of time to do and you typically need 2 coats.

There really is no wrong or right in this. It really comes down to how much time you have, the tools you have, what you want it to look like, and budget. (spraying will cost more)

How can we help you with your painting?

This question was from a job site in Elgin. We are working in Huntley, Algonquin, Crystal Lake, and Pingree Grove over the next few weeks. You may have a question about your Painting project. Let us know how we can help or get your question answered.

There is mold behind my wallpaper!

MOLD?! There is mold behind my wallpaper! What the heck?

This is not only gross looking, but dangerous. Hi! David Cook, owner of D’franco Painting & Wallpaper Here in Huntley, IL, with another quick blog for you with issues and questions we face when in customers’ homes and business locations.

The most common type of mold species that can readily be found under wallpaper is black mold. This mold can be either surface mold or mold that completely penetrates surfaces permeating through the drywall. Black mold is also known as Stachybotrys, and this type of mold can be very toxic to your health if left untreated.

mold behind my wallpaper
Mold behind wallpaper.

Mold that is in your home is DANGEROUS

As you may or may not have seen or heard, toxic mold and indoor air pollution from biological sources seem to always be in the news. This is due to several factors, there is awareness of how much mold, especially toxic mold, can affect your health.

Roughly 35-40% of buildings have some form of mold. These dangerous mold spores are in over 25% of residential homes!

Mycotoxins that are released by mold are more problematic than pesticides or heavy metals because they can affect a more diverse range of biological systems than pesticides and dangerous heavy metals.

The mold most often on walls behind wallpaper (Stachybotrys) emits trichothecene. Concentrations of this dangerous mycotoxin has the ability to inhibit protein synthesis and affect every single organ of your body.

It’s also worth considering that fungi like mold also have a high rate of mutation. This means it is possible for mold to produce novel species that is capable of evading your immune system.

One nasty mold that can be very hazardous is the type of mold known as Cryptococcus. It actually has a mortality rate that’s estimated as high as 30% for those who become infected.

Most indoor mold problems are related to construction defects or home maintenance issues that allow for water intrusion. However, things like localized flooding and certain lifestyle habits can also greatly introduce the chances of mold invading your home to establish a long-term presence.

Don’t blame yourself- it’s not your fault there is mold.

People will always ask- what did I do wrong to get mold? The answer is always the same- you didn’t do anything wrong. So there must be something wrong with the wallpaper!

It is NOT the wallpaper’s fault you have mold!

There are several reasons why mold will show up:

  • Water from leaking pipes, flooding, etc.
  • Walls that were not insulated. Moisture getting in behind the wallpaper through the insulation.
  • Contaminates. Sometimes wallpaper adhesive could have been exposed to mold contaminates.
  • Mold was already on or in the wall before wallpaper was installed.
moldy walls
Moldy Walls, Elgin, IL

If you are living in the North West Suburbs of Chicagoland such as Elgin, Schaumburg, St. Charles, Crystal Lake, or Bartlett, Mold can also happen because of improper ventilation, condensation, and of course water leaks from water pipes or toilets. These calls or mold issues are the most common calls we receive too get help with.

moldy wall behind wallpaper
Moldy wall behind wallpaper, Schaumburg IL

Removing Moldy Wallpaper

If you see that the wallpaper in your home has mold growth, you should remove it. If the problem is significant, you may have to have a professional mold remediation service with the right tools, training, and experience to effectively eliminate the presence of mold from the home or building. Here are the steps you should take to do it safely and effectively:

Step 1:

Wear old clothes that you plan to discard. Wear a respirator mask that is rated for to screen out microbes. Protective eye-wear is also a very good idea, as are latex gloves. Some types of mold can cause severe skin irritation. It’s also a good idea to cover all furniture with plastic in the room and keep the door shut.

Step 2:

Peel away a small strip of wallpaper. Take a close look for signs of mold on the wall or the back of the paper. It might look black, red, orange, grainy, splotchy, or discolored.

Step 3:

Carefully remove all the wallpaper from around the affected area. There are several different types of wallpaper stripper sold in stores. Renting a wallpaper steamer might also be worth the time and money.

Step 4:

Mix 4 parts dimethyl ammonium chloride with 1 part of water in a bucket. Brush the solution over the mold. Then be followed by applying a solution of 3 parts disodium octaborate tetrahydrate with two parts of glycol. Sounds fun, right?

Using these solutions in tandem has proven to be highly effective for killing mold on wallboards. The combination is particularly effective on mold on wallboards. Still, it is best to do multiple applications!

Step 5:

Allow the treated area to thoroughly dry before cleaning it with soap and water to remove the dead mold.

Step 6:

Shower and clean yourself thoroughly. Make sure to bag all the clothes you wore and discard them immediately.

So, what’s next?

Now that the walls are clean, it’s time to let the walls dry out. Use some fans and a dehumidifier. Once dry, use mold killing primer. Block it out, seal the walls. Once the walls are dry and primer is out, you have a fresh slate.

Are you ready for interior paint? Wallpaper? Now that you have fixed the problem, the walls are yours to do what you please! So, let us help you love the space you’re in…the right way!

Common Problems why Paint Does not Match Swatch Colors

You are getting ready to paint your house. On the way home you went to the paint store to get paint swatches of colors you like. To make sure you like the colors, you bought sample quarts and painted your walls. When the paint dries- What the Heck! The Paint does not match the swatch Colors!

Hey Everyone- David at Dfranco Painting and Wallpaper here in Huntley, IL. Helping you with your questions on painting and wallpaper. This question was also our problem last week. As we were painting a house in Huntley, Painting in Pingree grove and Painitng in Barrington, we had 3 separate jobs where the paint and paint swatch were off. So lets look at why and what you can do to make sure it does happen to you! We are takig a peek at the 2 brand we use the most, Sherwin Willliams and Benjamin Moore.

paint color not matching paint swatches

Reasons paint colors may be wrong- Benjamin Moore

Let’s start with Benjamin Moore. We do use this paint, but as needed or when requested. Our reasons have been cost, locations and issues with color. They have great paint and colors. We are just tired of dealing with issues that cost us time and money. So – we have found that:

  • BM colors are printed. (most are) These are printed in different areas of the country. So with different printers come different colors. There doesn’t seem to be any standard color verification process to verify color from location to location, or from different runs/years. Which means you can have color 1 from 3 different printers. They are dispursed at dozens of different stores- giving you a variation in color form store to store.
  • Paint bases and Paint tints change every 2 years or so. If the paint swatches have not been updated or you have old fand decks- the color may be different
  • proprietary colors. Each paint company has colors they pride themselves on. These paints are made by using, a base and tints that other companies do not use. For example, if BEhr uses black tints and SHerwin uses black tint the colors should match. But if one of these do not use black but use other colors to get black- the paint color will never match.
  • matching chips vs computer match. This gets to the paint swatches again- if a swatch is being used to make or have the paint matched too- at store A, but store B uses the computer formula- there will be a difference.
matching color by eye or hand

Problems with wrong colors – Sherwin Williams

By and far the most common problem with paint colors being wrong is older or outdated paint chips. Next would be name or color spelled wrong. Lastly, it is trying to make a competitors color.

There are certain colors, that just cannot be made from one brand to another. Using a swatch to verify the color you want is the best method to make sure this issue does not happen to you! Paint stores with experience and good reps will just tell you that up front. These people will let you know up front- it will not match or be off by “x” percent.

We have been using Sherwin for some time now and we have had very little (zero) issues with colors being wrong due to swatch or color matches. Im not 100% sure why, but they seem to be more systematized which helps reduce these issues taking human error out of the equation. AGAIN.. best way to make sure this does not happen is to have the paint swatch in hand use it to verify color you want.

Other top reasons paint colors do not match

Some of these reasons may be the same as above. We just want to make sure you know what we know to be better informed.

  • To be 100% fair across the board- every paint maker will tell you color from swatch to paint can vary 1-3%.
  • old paint swatches. Paints ae updated often. New tints, new base formulas from year to year change the coloration
  • human error. Did you know that people with blue and brown eyes see color differently? With that in mind- your color may look different because of eye color!
  • lighting affects colors. Different light makes color look different. Time of day the sun will shift color appearance. Fluorescent vs LED will make a difference.
  • Reflection. As you paint, reflection will matter. If you have a lot of green trees outside your window, that green will refect in your home, affecting the color. Have you ever painted red? the red turns white paint colors pint because of reflection!
  • Sheen. the sheen of paint will change how colors appear as well. (this is a issues with swatches more than anything else)

How to make sure your paint colors are correct.

Lets list this one out…

  • give your painter a list of name and number of colors you want
  • if you have paint swatches- take them to store or give them to the painter so the color can be matched
  • make sure you have the most up to date color swatches
  • hire a designer to do the work for you!

HAve other questions about painting- let us know how we can help!

How much will it cost to paint a room?

If you are here, you want to know how much it will cost to paint a room in your home or office.

This question (how much it will cost to paint a room) is one we receive regularly. There are some variations to geving a cost to paint a room, but we wanted to at leaset give you an idea of how much we charge for painting. 

Thanks for reading as well as checking out our website, I am David Cook, the owner of D’franco Painting & Wallpaper in Huntley, IL . So let’s dig in to this question!

cost to paint a room - interior painters huntley

The basic information needed for a paint estimate

First, we will want to know is how did you find us. Odd? Not really…we want to know what works: Facebook, YouTube, blogs like these, referrals, or paint stores. We love to give gifts to our raving fan customers!

Now that is out of the way, here is what you can expect us to ask you:

  • When are you available for us to come out and look?
  • Can we do it virtually? usually with the help of realtor listings
  • Do you have any other work being done (floors, electrical etc.)?
  • Do you have a color selected already?
  • What is your time frame to have this done?
  • Do you have any allergies or reactions to paint?
  • What are you looking to have painted in “x” room? (walls, ceilings, base trim, windows, doors?)

We have our scope of work. Let’s break down the work needed to paint a room…

For the sake of this blog post, we will assume you are looking to have walls, ceilings, and also base trim painted. When we come and look we will have more questions. For example:

  • Are you planning on new outlet covers?
  • Do you need help moving furniture?
  • Will you be changing light fixtures?
  • Are all of the pictures going back in the same place?
  • Do you want to keep the cable/phone outlets?

With this information, we can now get to the work. We will perform and that is needed to paint your room so we can determine the cost.

  • We need to move and cover the floors and furniture.
  • Outlet covers, light switch plates as well as vent covers will need to be removed.
  • The floors will need to get taped off so we can paint the trim.
  • The base boards, the window trim and door trim will where needed be re-caulked to get rid of any gaps.
  • Any holes, nicks, dings, or scrapes on the wall get filled and also repaired.
  • The walls will get a quick pole sand -provides a smooth finish coat, better paint adhesion.
  • Ceilings will be painted with one (1) coat of paint.
  • Walls are painted with two (2) coats of paint.
  • A 12 month warranty. We come back in one year if you need a touch up.

So, how much is my room going to cost to get painted?

With the above information, we measure the room, and then enter it into our estimate software. The room we are using as a guide above was 12×12. With the 2 gallons of paint for the walls, one gallon for the ceilings, and either quart/gallon for trim, all caulk, plastic, tape, rollers, as well as repair materials, you can expect to pay about $705.00.

What is not included?

  • Painting outlet covers
  • Closets
  • Moving heavy furniture such as pianos (anything that may need two people)

We use Sherwin Williams and Benjamin Moore products unless otherwise requested. As listed above we offer a 12-month warranty period. This means that in one year we will call to see how things are looking and come back and touch up for up to one hour for free, if needed.

Can I get a virtual estimate to paint my house or room?

yes you can! We are still learnign some of the nuances of on line listings, images or imformation, but in General the real estate web sites like Redfin, do a pretty good job of having images of the homes and well as room sizes.

Some of the issues we do get into, is wall damage, height of ceilings, issues with previous paint (runs/drips). These are not major obstacles, just things that will affect the final price.

Well, what are you waiting for?

Call, text or click the get estimate now! Let us get you to love the space your in today!

virtual estimates
Should I Paint My Cherry Cabinets?

Should I Paint My Cherry Cabinets?

Maybe you should ask are you ready to paint your Cherry Cabinets?

If you are like many of our customers in the Chicagoland area, such as Elgin, Algonquin, or Crystal Lake, you have a home that has wood cabinets. Do you have solid wood cabinets such as cherry and you are not happy with the look and feel of your kitchen? Have you been looking at Pinterest, Google images, watching HGTV or YouTube videos about painting kitchen cabinets? Are you afraid of making the right decision? Then you are not alone. I too have felt this fear and faced these same questions so you are in the right place. Now we’ll answer the question- Should I paint my cherry cabinets?

before cabinet painting - should i paint my cherry cabinets
Do you have this?
painting cherry cabinets white
But are you ready for something like this?

How much will it cost and will it last?

These are the two questions most people are asking when facing the question or problem of kitchen remodeling, but for most people, it is the same answer.

  • The cost is based on how many cabinets you have
  • The process is proven to last- so we give you a lifetime warranty on our work
  • We even come back in 1 year to do a check up if you need it

A common question- how much does it cost to paint cabinets compared to replacing the cabinets. Right now, you can expect about $135.00 per cabinet to have it painted. That is an average so you can do some rough math by counting your cabinets. When you look at the cost to replace your cabinets, it will be 70% more expensive than painting them and with the money you save by painting, you can now upgrade your door hardware, your countertops, your sink, and most likely your appliances to have a new kitchen you want and enjoy.

Cherry cabinets before being painted white
Cherry cabinets after being painted and glazed

The other cost is the loss of your kitchen. If you replace your cabinets, think about the fact that you will have no kitchen to use for several weeks. You will not have appliances. You will have to remove everything from your cabinets and store all that stuff for 2-4 weeks! There are always surprises as you take things out and replace that end up costing more money and time away from the most popular part of your home. If you don’t have a 2nd place in your home to cook, that is a lot of money to buy food ready to eat vs. cooking in your home.

The best part is YOU decide what color you want! You can go to any JC Licht Store, or Sherwin Williams store in the Chicagoland area, pick any color you want- you can even pick two colors if you wish!!  (If you select the whites from BEHR- we may not be able to match it 100%)

So, can I paint MY cherry cabinets

YES!!  You have just read the inconvenience of replacing your cabinets with new ones. When we paint them, you get to use your kitchen! There may be a few hours in the course of the day we have plastic around your appliances to protect them, but every night you use your kitchen! And since you don’t have doors you can access everything in your kitchen quicker! (That one was meant to bring a smile). Before the details of how, there are several questions you have to be able to honestly answer to know if painting your cherry cabinets is a good solution for you.

  • Is there anything wrong with the cabinets you have? Is there any damage? Are there any broken doors? Do they have water damage? If you are saying no to any of these then so far you are on your way to painting your cherry cabinets!
  • Do you like the look of a painted cabinet? Some people, my father being one of them, cringes at the sound of painting wood. If you are not sure then take a few hours and go to a home improvement store like Home Depot or Menards to look and touch. Ask yourself if you can see yourself with painted kitchen cabinets.
  • If you are still feeling good about the idea then it is time for the next step!
before cherry cabinets painting
Original cherry cabinets
Painted cherry cabinets

Things to Consider Before Painting Your Cherry Cabinets

But! There is always a but. There are a few things you need to be aware of if you have never had a kitchen or any cabinets that are painted. Painted cabinets are not like stained wood cabinets. I know you are here because you want to know about cherry cabinets, however, if your cabinets are pine-stained cherry color, this is not for you. Pine cabinets are not good candidates for paint. But you have solid Cherry! Stained cherry cabinets have a finish that has penetrated the wood fibers themselves to bond into the wood. Paint on a cabinet is given a bonding primer to stick to the surface of the cabinet. Then the paint is put on top of the primer. This is the same in a new factory cabinet or a refinished one like you are thinking about now.

Keep in mind, at the end of the day this is paint. It is a hard shell, it will resist stains, it will be washable, it will look impressive. Paint on wood can chip upon impact and wood doors will not allow you to place wet towels or rags on them and not become damaged.  I have to give you those buts up front so you know.

I have painted my cabinets in my home, people are doing it every day, and I believe it a great way to not just improve the look of your kitchen but change how you feel about the most important room in your home.

It Worked For These People, And It Will Work For You

Here’s what it did for me… Before I met Daphne and we were married, she had her cabinets painted but didn’t like the color. There was still nothing wrong with the cabinets-just a color -the wrong color. We picked a new color, had some new hardware installed, where there were none before and now we have a kitchen that my wife loves to look at and loves the feeling she has when we are in it. So I have used the materials, process, and system in my home as well.

Here is one testimonial from a great customer in Elgin, IL about painting cherry cabinets:

What are you getting when you paint cherry cabinets?

When you hire D’franco Painting & Wallpaper, you’ll have the peace of mind of …

  • Having employees of D’franco Painting & Wallpaper in your home, not subcontractors.
  • All of our employees get background checked by a 3rd party vendor.
  • We carry workman’s comp and liability insurance.
  • We have a system and process that has is used, always evaluated to improve and refine. And for over 15 years we still attend training annually to make sure we provide the best products for your home.
  • Lifetime Warranty on our work. We will come back on your anniversary every year and give you one hour to do the minor touch-ups that you may need
  • We use cabinet-grade cabinet paints from ML Campbell, Chem Aqua, Shurwood, or ILVA. These are time-tested and award-winning finishes that will last and meet the demands of the most used room in your house. (the paint we use is varies on cost, color and availability)

It’s Decision Time

You have a choice to make: Keep looking at your cabinets and wonder what if…or worse, do nothing at all. You know where that will lead (to another web search on cherry cabinets, frustrated about the look and feel of your kitchen). Is that really where you want to go? Take a new action, and get a new result. Finally, get that estimate and transform your kitchen – Love the home you live in! Which do you really want for yourself? So here are your next steps: Call or text us

  • We will ask you for pictures of your kitchen
  • We will give you a cost to paint your cherry cabinets within $100-$200. It includes removing hardware, cleaning, painting the outside of the boxes and both sides of the doors. If the numbers look like you want more information we will make an appointment with you. We will come to your house with a door sample that you can touch and see. We will inspect everything and then give you an accurate quote of the exact cost
  • Receive a detailed description of how our process works and give you videos to show you of us in action.
  • You receive a list of products we use
  • You may qualify for a free color consult!
  • You’ll have a lifetime warranty.

So, you have asked the question “should I paint my cherry cabinets?”, and you have read the answers, now you are ready to take action and get a GET AN ESTIMATE today!

We look forward to helping you love the home you live in!

Here are some other blog articles on painting cabinets we have for you:

beautiful room and kitchen
5 ways to remodel your kitchen vs replacing your cabinets

Yes!  You can remodel your kitchen and get the same affect as replacing your kitchen!

Hello everyone – David Cook with D’franco Painting and Wallpaper in Huntley, IL. Today, we are talking about ways you can remodel or update your kitchen vs having to replace your kitchen cabinets. We have 5 ways you can make significant improvements to your kitchen and not break the bank in doing so.

Tip 1: Install kitchen cabinet hardware to give your cabinets a facelift!

This tip is by far the easiest thing to do in your kitchen. If you do not have hardware- knobs or handles on your kitchen cabinet doors or drawers- then it is time to do so.  By adding hardware:

  • You improve how the kitchen looks
  • In using knobs or handles you will reduce the wear and tear to your wood cabinets
  • The cabinets will be cleaner, as the dirt goes on the handle not your cabinet
  • But where should I go to buy hardware?…. lol watch below

Tip 2: Replace your counter tops with something new

If you are ready for something to give boost in your kitchen, then it is time for new counter tops.  In our last kitchen, we were able to help our customers in getting new counter tops from a company in Huntley, Old World Stone. I have not heard a negative complaint about them yet.  With the size of your counters you may be able to mix and match and really have some fun, get creative, and take advantage of small slabs of rock to save you money and create a unique look for your kitchen

For those of you in some of the subdivisions in Pingree Grove, Huntley or Gilberts, Old world stone is a great place local that you can have get you information on new counters.

Tip 3: Install new sink and faucet

Many times the sinks and faucets are the original pieces from when the Kitchen was built. That doesn’t mean it is a bad thing- it just means that the sinks and fixtures are usually dated.  Combine the sink with the counter and you can really have some fun! The new faucets come is so many styles colors there is not more settling for what you see on the self!

I say to add new sink or faucet- but I will also say “I HATE” plumbing! So this may be a thing to hire out- as we found that some newer faucets require newer goofy fittings

Tip 4: Install sliding shelves in your cabinets and update how your kitchen works!

Last week we installed some sliding shelves inside cabinets that we were painting. It took some weeks to get them, but we were able to take a cabinet with a flat bottom and turn it into a sliding shelf!  (these were from slide a shelf) We actually got them though costco!

kitchen cabinets with no sliding shelves
cabinets with no sliding shelves
installing sliding shelf in kitchen cabinets
A new sliding shelf in existing cabinets

Here is a video on installing sliding shelves in your existing cabinets


Tip #5: Paint your oak, cherry or maple cabinets!

We have done many blog posts and Youtube videos on this one, but here is a pic of the last job where we did all of the above! (had other contractors help)

5 ways to remodel your kitchen vs replacing your cabinets - kitchen cabinet refinishing

here is the kitchen just finished with Counter tops, new sink, new faucet, and 2 tone painted oak cabinets

before kitchen cabinet refinishing

Here is a before image of the kitchen before the new sink, faucet, counters, and painted cabinets.

after kitchen cabinet refinishing - dfranco painting
Oak cabinets painted white and grey

You would never know there was Formica, solid color sink and faucet, and honey oak cabinets in this house!

Now it is your turn! How can we help you with your kitchen and make it into a room you will love!

Best paint for bathrooms

Are you getting ready to paint bathrooms for the 1st time or repainting your bathroom a new color or remodeling. Knowing the right paint for a bathroom will save you a lot of headaches down the road. There are several brands of paint for bathrooms. For today, we are only looking at two, Sherwin Williams and Benjamin Moore. So – what is the Best Paint for bathrooms?

Hey Everyone, David with Dfranco Painting and Wallpaper, here in Huntley, IL. This week, we had 2 people ask the same question, the subject of today’s blog post, what is the best paint for bathrooms. Then we had similar questions as to what to difference is between bathroom paints. So I gigured we better answer the question!

Does it matter what paint you use in a bathroom?

Absolutely! Bathrooms are a unique area of the home. Every home is unique. Painting homes is Elgin, IL can be fun for sure as they have a huge variation in age. With age comes a wide array of builders, materials used, and substrates we have to paint over. But as the bathroom is the room most often visited outside of the kitchen, it needs to be painted right! With that, a bathroom has special needs to keep it looking great for years to come.

Bathrooms- those with bathtubs or showers especially, need the right paint. The paint needs to be able to withstand moisture that comes from steam or water that comes from the sink areas from hand washing.

Washability is also another concern for bath paint. MOst batrhooms are used to get redy for the day. In getting ready there are certain products that are problematic for paint. The biggest problem product is hairspray! Hairspray has silicates in it. These silicates make it absolutely a nightmare for painting. Silicates, in general, are waterproof or water-resistant. So they may be great for makeup, hair care etc, but when it comes to painting a bathroom, hairspray on the surface of walls and cabinets is a huge- as Donald trump would say HUGE, Big, im talking out of this world big..lol.

hair spray in bathrom paint
hairspray residue on bathroom wall paint

We won’t get into how we get over silicate issues to paint. We are talking about the right paint for bathrooms, so you can have the right paint so you avoid problems.

Does sheen matter when painting a bathroom?

Yeah buddy! Every home is different in some ways For example older plaster homes have different issues than new construction. However- one things is constant, water penetrates. If you add soap the equation then water penetrates even more.

When we are painting a bathroom, we recommend eggshell or satin as the minimum sheen to use for the walls and ceilings. These sheens have a built-in water moisture repellance due to the sheen. The higher the sheen the more water will bead or repel from the surface.

Think like a car- those shiney cars have water beads whenever they come in contact with water. I would not want that for the walls of my house, but you get the idea.

Can you use flat paint in a bathroom- yes, but flat paint is very absorbent. Extra moisture from shower or water will be absorbed into the paint which then is absorbed into the walls. For some homes it may not matter. But it is something to be aware of.

wtaer on flat paint
water absorbing into flat paint

Sherwin Williams Duration Paint

For us, we have turned to Sherwin Williams for most of our paint use. Customer service, warranty claims, on-site visits, and price have been the reasons we made that choice. As it relates to bathrooms- Duration is their product of choice and recommendation.

Now I am not gonna get into the tech that can lead you down a rabbit hole, I am just discussing what i think the best paint for bathrooms – based on our experiences in your homes.

Duration, is fast drying, 1 hour to the touch, 4 hours to recoat, and about 8 hours you COULD take a shower. The label shows Moisture vapor tech- no clue what that means lol. What I do know is that those claims have been tested and found pretty true. And to date, we have had no issues.

No matter what paint you choose- I would still suggest waiting 24 hours for it to dry before using the bathroom after painting.

Benjamin Moore Aura Bath and Spa Paint

Until 2 years ago, we used this product on every bathroom we painted. Overall- we have no problem with it, if you select certain colors – you have no choice but to use it, as the colors cannot be matched in other brands.

Bath and spa paint goes on nice, has a great sheen look appearance and feel. Their product also is dry to the touch in 1 hour, but claims it can be recoated in 1 hour. They also recommend 24 before using the area.

We have not found that to be true, we had two failures in a row, both were recoated in under 4 hours. We do not know how soon the owner waited to shower, but we left at 1pm. So, we assumed it was later in the day that the shower was used. But- but both jobs had us called back within 3 days.

running lines on bath paint
running complaints in a bathroom

Both rooms had severe “running” the moisture rand down the wall and left stains. We do not know why. After having to repaint two baths for the same issue, we just made the choice to stop using this product. I know there are people that use it ever day with no issues, and I am happy for them. We have just had a different experience.

Duration Vs Aura BAth and Spa paint

I am not a huge fan of the VS conversations or comparisons. Most of the time, there is an agenda to sell a specific product. We are here to give you our field use what we use. Giving the facts of our situations. We cannot control what happens when we leave a house. So when there is a product failure like we had, we have to find out how to avoid it again.

It is very possible that the Spa paint was exposed to shower moisture sooner than the suggested 24 hours. These homes were also built in the same 90’s time frame. So there could have been an issue with the vent fan. The house could have been too “tight” not allowing fresh air to circulate in the home. We just dont know.

So- again these are our results, based on the homes we paint everyday, and the product we use everyday. Im sure you will find other people who will say something different. However we warranty what we do. Which means we solve problems- not make them. If a product we use fails, we fix it. It would be great if the manufacturer would stand behind what they sell, but we know that doesn’t always work. So we at D’franco Painting, have to be ready to stand by our work.

If you have questions- let us know- we would love to help!

What towns do Dfranco Painting work in

One of the top questions we are asked outside of how much something will cost is Where we work. So here is a short list that we will update with the towns as well as some of the things we like most about each town and where we go when we are there!

Hello Everyone- yesterdays call- “What towns do Dfranco Painting work in” is todays blog post. As our office is in Huntley, IL, we would love to have all of our workers in the Huntley area. That being said, we will just go through a short list of places we go, keep checking back as this list will grow!

Dfranco Painting in Elgin, IL

belive it or not there are quite a few Elgin’s! Our shop was located here for 3 years and Daphne and Iived there for almost 10 years, (she lived there a bit longer than I)

Elgin

The cool thing about Elgin is the Diversity! from large homes to historic older homes- it is such a fun city to be able to work in. Not a fan of the trains dividing the town in half, but it is what it is. We look forward to helping all of you as we expand in to exterior painting in 2024!

Top rated Painter and Wallpaper in Huntley, IL

It has been so great to grow in our own town! We love being able to drive less than 10 min to stores and job sites. Aside from working in Dell Webb, the other Huntley communities have been so awesome to work with. Make sure you keep watch out for the Dell webb showcase home shows!! And the Lifestyle magazine if you are a Dell webb resident for ads, specials or events.

Huntley

Interior painting in Pingree Grove, IL

As we have some of our friends and family living in Pingree Grove we want to make sure this is a another town where we plant our flag! So we cant forget to add Pingree Grove to what towns do Dfranco painting work in

Pingree Grove

We look forward to being in the Pingree grove community flyers and the home show in 2024!

Wallpaper installation as well as painting in South Elgin, IL

As we have family, church members and friends in several areas of South Elgin, we dont wat to miss the opportunity to help with commmercial and residential opportunities in this town

South Elgin

It has been great being able to work in some of the commercial properties in town, installing commerical wallpaper and murals in stores such as Walmart and Mcalisters.

Helping other in St.charles with Cabinet Painting

St. charles has been one of the top cities where we are doing cabient re painting!

St. Charles

St. charles is another one of those cities we look forward to doing some exterior painting in 2024. I have yet to see the Walhbergs- but they make pretty decent burger!

Book Your FREE Estimate
MM slash DD slash YYYY
This field is for validation purposes and should be left unchanged.
close

Your Free Estimate

To help home and businesses owners during this challenging time, we are offering free virtual estimates.

Fill out the form below and we will schedule a time for a free video call estimate.